Inspecting the Lid Catch, Latch, and Spring
Some locations may choose to do this procedure on a more frequent basis (i.e., quarterly, semi-annually, or other frequency).

|
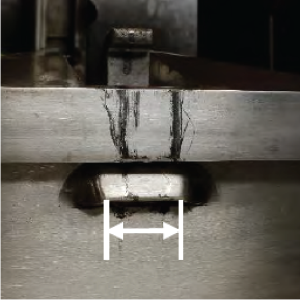
Fire Hazard To avoid fire, remove fryer from service and replace vat if any oil accumulation is noticed on a vat weld. |
To make sure the latch, catch, and latch spring are properly installed and are within tolerances for safe operation.
Inspecting the Catch
-
Slide gauge #162410 along the entire width of the vat catch.

-
If this gauge does not slide over the catch, or the lip of the catch does not match the profile of the gauge as shown, the catch is out of tolerance. Take the pressure fryer out of service until the vat has been replaced.
Inspecting the Latch
-
Separate the lid and the cross arm.
Notice the gap in the middle of the latch.
-
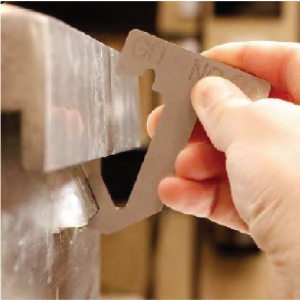
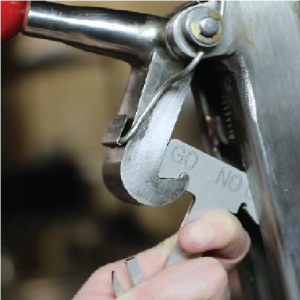
Slide the “GO” side of the gauge over the entire width of the latch. The latch should fit in the groove, except for the gap in the middle.
-
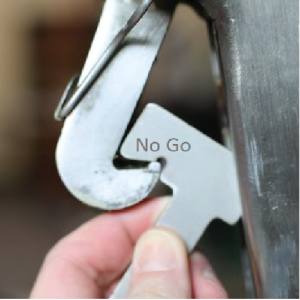
Slide the “NO GO” side of the gauge over the entire width of the latch. If the lip of the latch inserts into the cut out in the gauge, this latch fails inspection and needs to be replaced.
Inspecting the Latch Spring
-
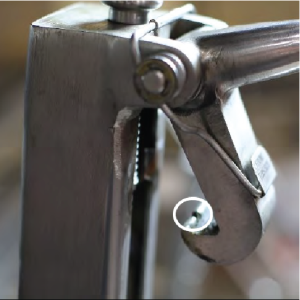
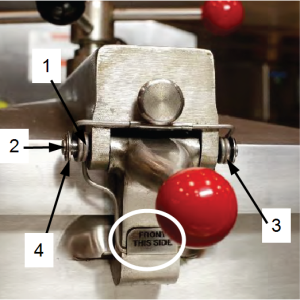
Make sure the each of the following components are not broken, not missing and installed correctly:
-
latch spring (1)
-
latch pin (2)
-
spacers (3)
-
C-clip retainer (4)
-
-
The latch spring is installed correctly if the label “FRONT THIS SIDE” is mounted to the front of the latch.
If any components are broken, damaged, missing or installed incorrectly, take this fryer out of service until the components are replaced and installed correctly.