Inspecting the Lid Counterweight Cable
flashlight
3/8” nut driver
Some locations may choose to do this procedure on a more frequent basis (i.e., quarterly, semi-annually, or other frequency).
AP0802029 and later

|
.To avoid personal injury or equipment damage, stop using the fryer and call service if lid become difficult to operate. |
-
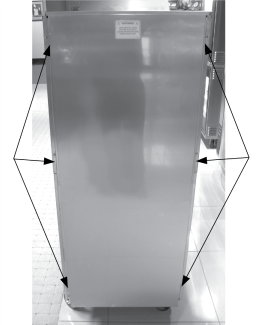
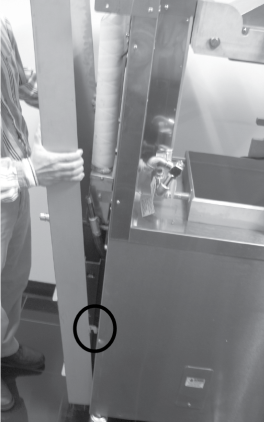
Using a 3/8” socket, remove the 6 nuts around exterior of rear cover.
-
Lift up on the rear cover and pull out at the bottom to clear threaded studs. Removing the top shroud makes it easier to remove the rear cover, but is not required.
-
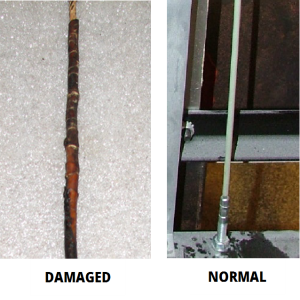
Inspect the counterweight cables. If cables have cracks in the jacket, missing pieces in the jacket, any fraying wires, or other obvious signs of wear, stop. Take the fryer out of service until the cables are replaced.
If cables are 10 years old or older, they must be replaced regardless of inspection results. For cables that do not pass inspection, replace with Kit #140225, following all instructions included with the kit.
-
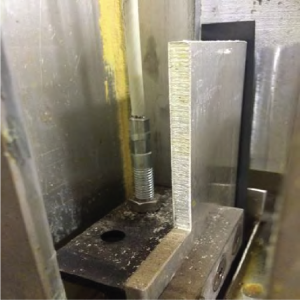
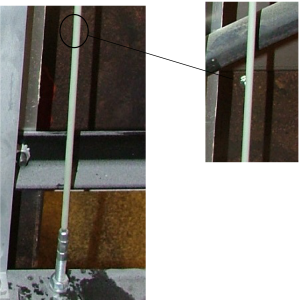
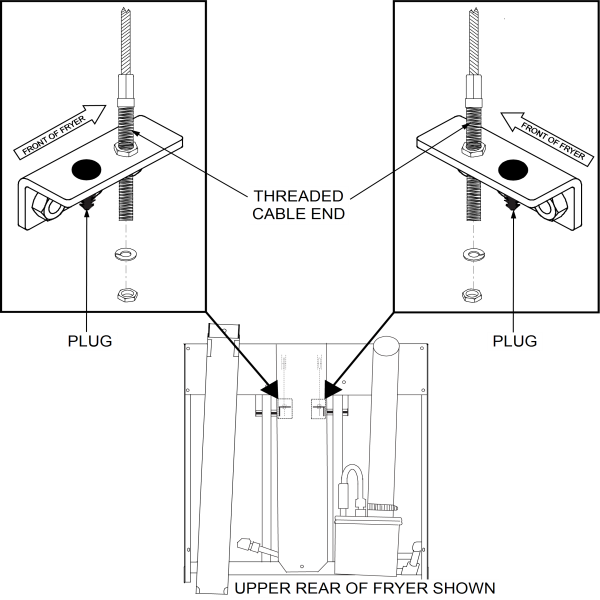
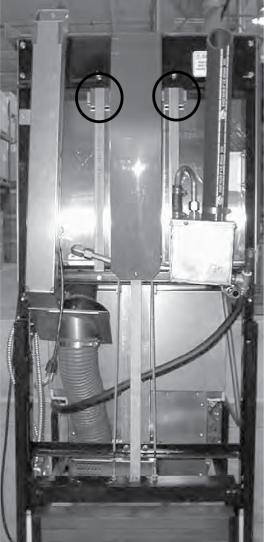
Inspect to make sure that all threaded cable ends are straight (not bent) and the cables are installed only in the holes that are closest to the front of the fryer. If either threaded cable end is bent, or either cable installed in the rear hole, take the fryer out of service until both cables are replaced. After the inspection, add plugs to both rear holes using the nylon plug kit 140501. These nylon plugs are also included in the cable kit 140225.
AP0802028 and below
-
Using a crosshead screwdriver, remove top screw, but just loosen the lower screw on each side of the fryer.
-
Lift out on the top of the rear cover and then lift up on it to clear loosened screw.
-
Inspect the counterweight cables. If cables have cracks in the jacket, missing pieces in the jacket, any fraying wires, or other obvious signs of wear, stop. Take the fryer out of service until the cables are replaced.
If cables are 10 years old or older, they must be replaced regardless of inspection results. For cables that do not pass inspection, replace with Kit #140225, following all instructions included with the kit.
-
In addition to the cable inspection steps mentioned in step #3, inspect to make sure that all threaded cable ends are straight (not bent) and the cables are installed only in the holes that are closest to the front of the fryer. If either threaded cable end is bent, or either cable installed in the rear hole, take the fryer out of service until both cables are replaced. After the inspection, add plugs to both rear holes using the nylon plug kit 140501. These nylon plugs are also included in the cable kit 140225.
-
Inspect to make sure the lid cables are installed in the correct hole in the cable mounting bracket. The cables should be installed only in the hole closest to the front of the fryer. Left cable installed correctly below.
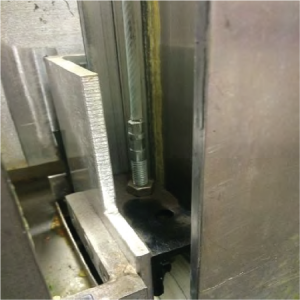
If either cable is installed in the hole that is closest to the rear of the fryer, the fryer would need to be taken out of service until both cables are replaced. Right cable installed correctly below.