Enabling the Network Connection
IMPORTANT: For new Wi-Fi-enabled units, there is a device called a "dongle" located at the back of the control panel. It resembles a USB drive and is inserted into the Beaglebone board. The dongle is labeled with a MAC (Media Access Control) address. For older units that were shipped and installed without a dongle, a retrofit kit containing the dongle can be purchased and installed. The MAC address is printed on a label attached to the dongle. To ensure proper connectivity, the MAC address must be added to the customer’s network configuration (e.g., IP whitelisting, ARP table, DNS server, etc.).
IMPORTANT: The McDonald’s eBOS network requires whitelisting of the dongle's MAC address 24 hours in advance of installation. This allows for Internet connectivity, which is required for certificate download. Also, an Internet connection signal strength at or below -80 dBm is required.
NOTE: These instructions assume the network hardware is installed and actively working. This includes IP whitelisting the MAC address, so the radio properly communicates with the customer's network router and server(s) as applicable.
Enabling the WiFi Radio
-
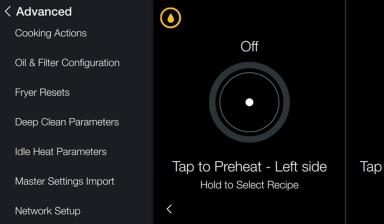
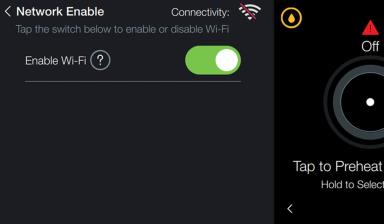
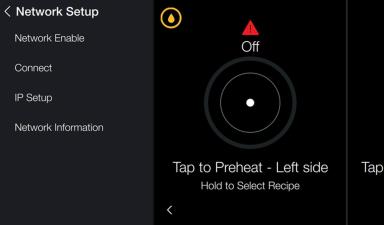
Navigate to Menu > Advanced > Network Setup.
-
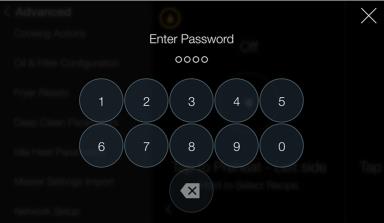
Enter the password, either service (1122) or manager (1234).
-
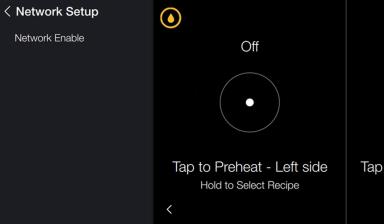
Select Network Enable.
-
Tap the slide button to enable Wi-Fi.
-
If the gray slide button turns green, the dongle is active.
-
A Wi-Fi symbol with a red strike-thru line indicates enabled but not connected to the local access point.
-
A Wi-Fi symbol without a red strike-thru line indicates enabled and connected to the local access point.
-
-
If the gray slide button remains gray, the region selection during the initial setup is not approved, the user will not be allowed to enable the network. Clicking on the slide switch will have no effect.
-
Connecting to the Access Point
IMPORTANT: The McDonald’s eBOS network requires whitelisting of the dongle's MAC address 24 hours in advance of installation. This allows for Internet connectivity, which is required for certificate download. Also, an Internet connection signal strength at or below -80 dBm is required.
Use these steps to verify connection to the cloud.

-
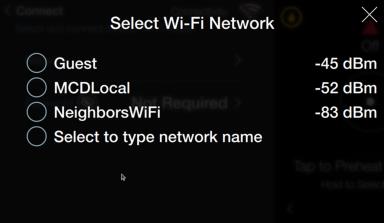
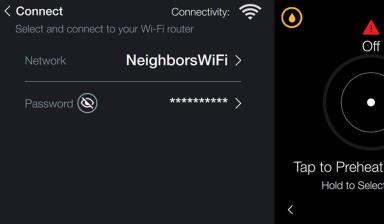
Once the network is enabled, additional options display, tap Connect.
-
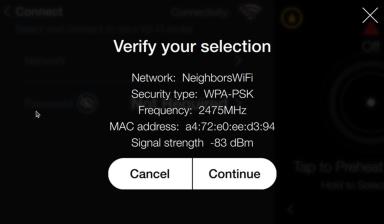
Tap a radio button next to the desired access point (router name) to connect.
-
Click Continue to connect.
-
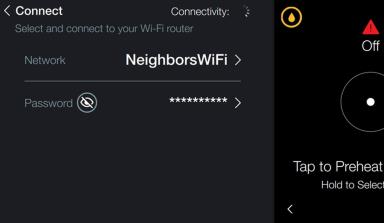
Enter the password for the selected access point.
-
Wait for the Wi-Fi symbol to display next to connectivity. When the symbol displays, continue to the next step.
-
Tap to exit > Connect.
IMPORTANT: An Internet connection signal strength at or below -80 dBm is required. A poor connection may not allow the certificate to download properly.
NOTE: If option “Select to type network name” is selected, a keyboard will display. Enter the name of the network, an approved Security type, and password if required.

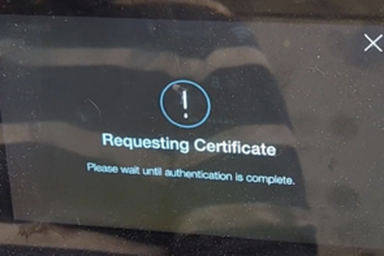
Certificate Installation
Once the fryer has connection to the Internet, and if the connection speed is Good (-80 dBm) to Great (below -80 dBm), the certificate will download automatically.
NOTE: After power cycle, the fryer will retry to download the certificate.
-
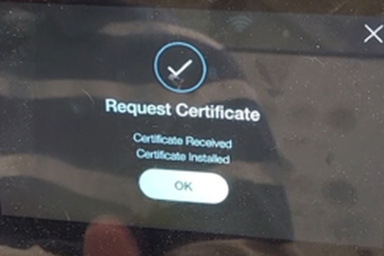
Wait, for the certificate to download.
-
Tap OK to return to the Network Setup menu.
Confirming Network Information and EULA (End User License Agreement)
Navigation: Settings > Advanced > Network Setup > Information
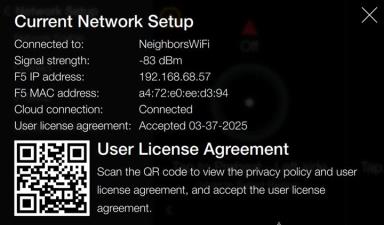
IMPORTANT: Wait, after completing these steps, it may take a long time for the End User License Agreement and date to display as Accepted.
-
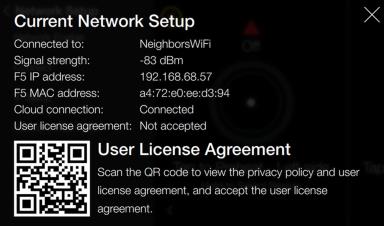
Tap Network Information for additional network details. User license agreement displays, Not accepted.
-
Scan the QR code and follow instructions to accept the user license agreement. The QR Code directs to commissioning.hennylink.com for commissioning of the unit.
-
Tap X to return to the Network Setup menu.
NOTE: Accepting the user license agreement will not immediately update this screen, it may take a long time for the End User License Agreement and date to display as Accepted.
Commissioning
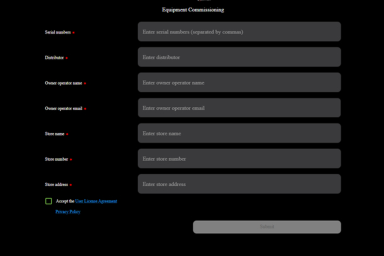
Navigation: commissioning.hennylink.com
-
Carefully fill out the commissioning form. The information entered into the form will determine what displays in the HennyLink application. Fields include:
-
Serial number: Enter the serial number
-
Distributor: Enter the distributor
-
Owner operator name: Enter the owner operator name
-
Owner operator email: Enter the owner operator email
-
Store name: Enter the store name
-
Store number: Enter the store number
-
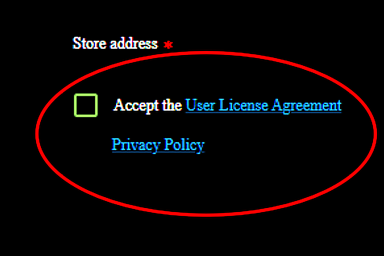
Store address: Enter the store address
-
Read the User License Agreement by tapping the link.
-
Read the Privacy Policy by tapping the link.
-
Tap the Accept the User License Agreement check box.
-
Tap Submit to save.
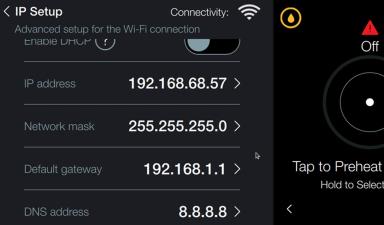
Manually Configuring an IP Address
IMPORTANT: Only use this option if directed by a Henny Penny Service Technician.
The following procedure should only be performed by an IT Technician.
-
Click IP Setup for advanced network settings.
-
Tab the slide button to disable.
-
Tap a field to enter the information.
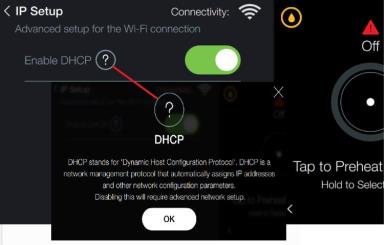
NOTE: Only use this option to manually enter network information.