Installing the Zigbee Radio
There are two major steps to installing the Digi ZigBee radio; hardware installation and setting configuration.

|
To avoid electrical shock or property damage, move the power switch to OFF and disconnect power. |
Installing the Hardware
-
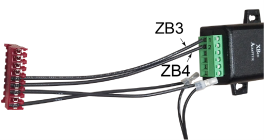
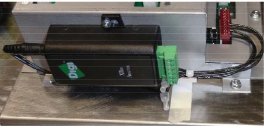
On a table or countertop, position the radio adapter so that the terminal block screws are face-up. Attach wire ZB3 to the left-outside terminal (1), and attach wire ZB4 to the right of the left-outside terminal (2).
Wire numbers are printed on the exterior insulation of the wire.
-
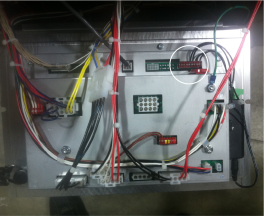
Using a crosshead screwdriver, remove the two screws securing the control board and lower it down.
-
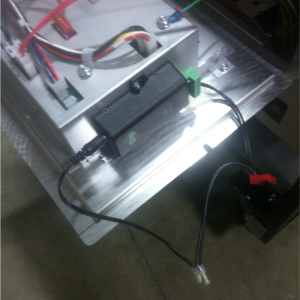
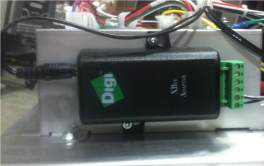
Slide the radio on to the studs, located on the side of the control, with the green (9-pin) connector directed towards the fryer.
-
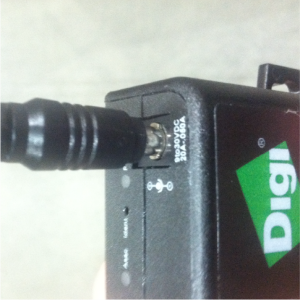
To attach the barrel connection to the radio, align the barrel connector with the notches located on the top of the radio. Press in on the barrel and rotate 90 degrees clockwise to lock the connector into place.
-
Using the nuts provided in the kit, secure the radio to the controls with a 1/4 inch socket or nut-driver.
-
Run the wires underneath the side of the adapter, then connect the 9-pin connector to the control board.
It is recommended to gather power harness wires and tie with wire tie.
-
Place control board back to factory location and secure with the crosshead screws.
-
Place the OP decal on the lower right-hand corner of the control board.
Configuring the OPS/QPM Settings
A configuration setting in the fryer control determines whether or not the OPS/QPM features are enabled. This programming operation can be performed whether the fryer is on or off, as long as the control is powered. Special Program Mode allows simple enabling or disabling of the OPS/QPM system on this fryer, but does not provide any further technical or diagnostic support. Diagnostic displays are easily accessible in Info Mode.
Enabling OPS/QPM

-
Press and hold the menu button (1) until *MAIN* displays.
-
Press and release the menu button (1) again, to cycle to the second set of menu options.
-
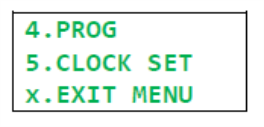
Select 4.PROG. Programming menus display.
-
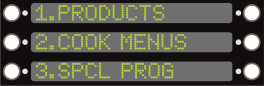
Select 3.SPCL PROG.
-
Using the number buttons, enter code 1, 2, 3.

-
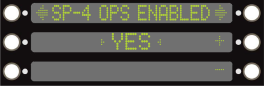
Use the top right arrow to navigate to SP-4 ENABLED.
-
Use the plus or minus buttons to change the middle screen to read YES.
-
Press and hold the menu button to exit special program mode.
Verifying Communication
Verify the Digi radio can communicate with the fryer’s control board and the network. OPS/QPM must accept the Digi radio to complete the connection and seamless data connection.
-
Press the menu (1) and info (2) button at the same time until ==INFO MODE== is displayed. Release both buttons.
-
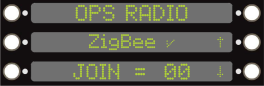
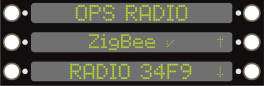
Press the left-arrow button to cycle to the last menu option. The Join Status screen displays.
-
The middle display reads ZigBee with either a check mark, a dash or a flashing X. See descriptions below:
✓: Control has received a good message within the past 15 seconds.
- : Last good message was more than 15 seconds but less than 60 seconds ago.
X: Control has not received a good message in more than 60 seconds.
These messages only indicate if the Digi radio and control board are communicating. It does not mean the Digi radio is communicating with the network.
-
The bottom display reads JOIN = followed by a value. If the value reads 00, this means the radio is joined to the network. Any other value means the radio is not joined to the network.
-
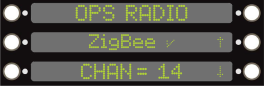
Use the down arrow to navigate to the Channel Status screen.
-
The bottom display reads CHAN= and gives a value. If the radio is joined to a network, that particular channel’s number displays. If the radio is not connected to a network, that value reads 00.
-
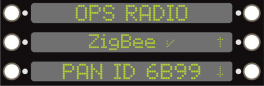
Use the down arrow to navigate to the PAN ID display screen.
-
The bottom display reads PAN ID followed by a value. If the radio is joined to a network, the ID number displays. If the radio is not connected to a network, FFFF displays.
-
Use the down arrow to navigate to the Radio Short ID display screen.
-
The bottom display reads RADIO followed by a value. If the radio is joined to a network, that particular radio module number displays. This varies for each radio and may change if the radio is unjoined and then rejoined to a network. If the radio is not connected to a network, FFFF displays.

-
Use the down arrow to navigate to the Reset/Unjoin Command display screen.
-
The bottom display reads RESET followed by a value. if the value is 00, no reset is required, or the requested reset has been completed. If the value is 01, a reset is pending.
-
To reset, press and hold the button next to RESET. The display counts down.
-
Once the count-down has expired, release the button and the radio now shows 01 for the reset code. The 01 remains until the radio completes the reset operation, then the code changes back to 00.
-
Press and hold the menu button to exit out of Info Mode.
Verifying the Cook ID Code
The OPS/QPM system in the store must be configured so that it understands which products are being cooked by the Velocity fryer. When a cook cycle is started, the data sent by the fryer’s control board (software) to the OPS/QPM system sends only a product number for the product being cooked, not the actual product name. The product number assignments are determined by KFC and change periodically. The product number mapping on the fryer is updated when the KFC menu is updated on the fryer’s control board.
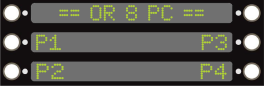
Each Cook Menu item has a unique product number that communicates with the instore system. To check each product code do the following:
-
Select a number button from the number pad to access the product menus.
-
With the products displayed on the screen, press and hold the same number button.
-
After a few seconds, each product name shows their unique product number.
-
Use the product number to identify what product is being cooked. For example, P3 represents Product 3.
Configuring the Identify Response
Even though the OPS/QPM computer is able to list any new radios detected within range of the network, there is nothing on the OPS/QPM screen that identifies what piece of equipment that radio is installed in. For example, if two new fryers are brought into the store on the same day, the OPS/QPM computer screen would see two new radios available, but there would be no way to know which radio is installed in which fryer. To clearly identify which radio corresponds to which fryer, every ZigBee device must implement an audio-visual Identify response. When the Identify command is sent from the OPS/QPM computer to a fryer’s radio module, the fryer control itself must beep and display a message to make it clear which piece of equipment to which the OPS/QPM computer is communicating.
For stores that have multiple units and need to quickly identify each unit’s channel ID, a signal can be sent from the OPS/QPM operating computer to the units. Once the channel ID is selected, the unit that is linked to that ID starts to flash ZIGBEE ID, and then beeps. A note can then be inserted in the OPS/QPM system to identify that ID with the correct unit.

If you are having issues linking the control to the Online Projections System, contact the KFC Help Desk at 1-800-HELP-KFC (1-800-435-7532).