Applies to:
![]()
![]()
Inspecting the Burner
Some locations may choose to do this procedure on a more frequent basis (i.e., quarterly, semi-annually, or other frequency).
Cleaning the Burner Jets
Remove breading, dust and obstructions from burner jets. Partially obstructed burners lower the BTU / KW output of the fryer which can affect cook times, product quality and doneness.
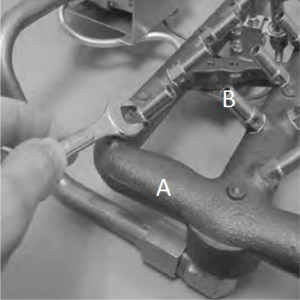
A= Burner Casting
B= Burner Jet (typical)
-
Check and adjust the fryer’s manifold gas pressure.
-
Visually inspect the burner for any signs of clogged or obstructed burner jets.
NOTE: The flame above each burner jet should be a consistent blue color and each jet should be about the same size. A burner jet without a flame or where the flame is yellow or small would be a sign of a clogged or partially clogged jet.
-
If there are any burner jets that are partially obstructed, turn off the gas supply to the fryer at the shut off valve, and then remove power from fryer at the wall outlet.
-
Remove the burner assembly from the fryer following the removal procedure in the technical manual.
-
Ensure the burner orifices are clean and free from debris. If debris exists, gently remove it by hand with an orifice cleaning tool.
-
Reinstall burners in reverse order.
-
Test gas connections for leaks.
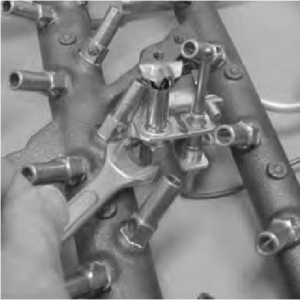
Cleaning the Pilot Assembly
Remove breading, dust and debris from the pilot assembly to prevent flame sense issues due to plugged pilot orifices, or a plugged pilot venturi.
-
Turn off the gas supply to the fryer at the shut off valve, and then remove power from fryer at the wall outlet.
-
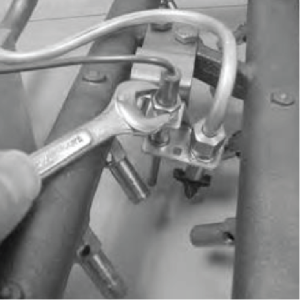
Remove the pilot gas line and pilot mounting screws.
-
Remove any debris or carbon build up from the spark ignitor and flame sensor (thermocouple on older units).
-
Remove breading, dust and debris from the venturi and pilot orifice. If the orifice is plugged, either remove with a very small wire or orifice cleaning tool or replace the pilot orifice.
-
Reinstall in reverse order and retest.