Inspecting the Crossarm Component
Some locations may choose to do this procedure on a more frequent basis (i.e., quarterly, semi-annually, or other frequency).
-
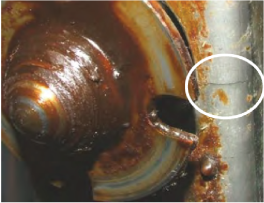
Separate the lid and cross arm.
-
Inspect the cross arm. Cracks on the bottom surface of the cross arm are acceptable, but anything rounding the corners, coming up the sides, or found on top would fail inspection.

If any of the following is found:
-
Cracks in the top of the cross arm
-
Cracks on sides of the cross arm
-
Spindle components are damaged or missing
The fryer must be taken out of service until the cross arm assembly is replaced. Otherwise, severe burns could result.
-
-
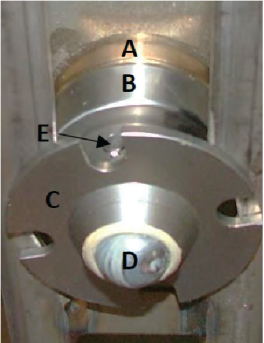
Inspect to make sure all of the spindle components are in place: acme nut (A), idle nut (B), thrust ball (D), locking collar (C). Inspect the gap between the acme nut and the idle nut. These two components should be within 1/16 inch of each other. If any of these components are excessively worn, damaged or missing, this step of the inspection would fail.
This pin should be staked on each side to prevent it from shifting. If this pin is not properly staked, severe burns could result.
-
Inspect the locking collar pin. If the pin has shifted, is missing, or is broken, take the fryer out of service until a new cross arm assembly can be installed.
-
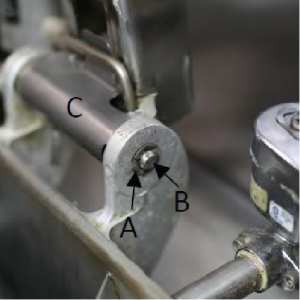
Inspect the hinge pin (B) to ensure it is not missing, damaged or broken. Make sure that the retaining clips (A) are securely in place on each side of the pin. If any of these situations are true, take the fryer out of service until the components are replaced.
-
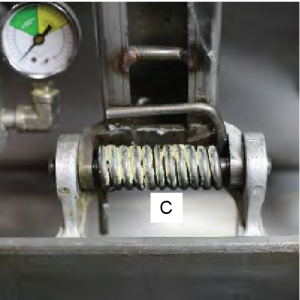
If the hinge spring (C) is broken, replace the spring as soon as possible. It will not fail the inspection.
-
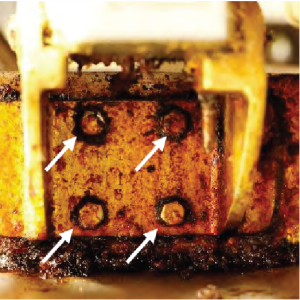
Ensure four bolts are installed in the hinge plate at the rear of the vat. Check to make sure these bolts are snug. If any bolts are missing, take the fryer out of service until they can be replaced.