Replacing the Ignitor and Flame Sensor Assembly
The flame sensor should glow a bright red when the pilot is lit and allows the gas control valve to open. If it does not sense a flame, it shuts off the gas control valve.
Replacing the Flame Sensor

|
To avoid electrical shock or property damage, move the power switch to OFF and disconnect power. |
-
Remove control panel.
-
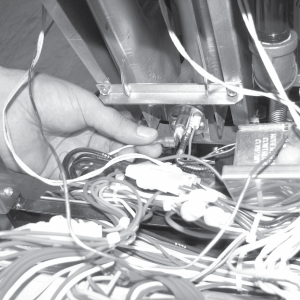
Pull wire from flame sensor.
-
Using a 7/16 inch wrench, remove the nut securing the flame senor and pull the sensor from the unit.
-
Install new flame sensor in reverse order.
Replacing the Ignitor

|
To avoid personal injury or property damage, before starting this procedure, move the main power switch to the off position. Disconnect the main circuit breakers at the circuit breaker box or unplug service cord from wall receptacle. |
-
Follow steps 1 to 3 above.
-
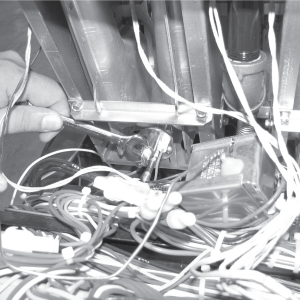
Using a 7/16 inch wrench, loosen the pilot, gas line fitting.
-
Using a small crosshead remove the two screws securing the ignitor assembly.
-
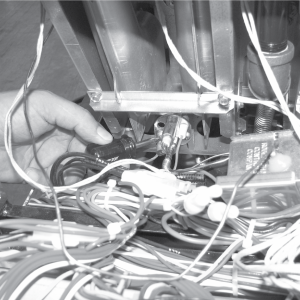
Pull wire from ignition module and remove ignitor assembly from unit.

-
Install new ignitor assembly in reverse order.
Related Content
Replacing the High Temperature Limit Control
Replacing the Temperature Probe
Replacing the Gas Control Valves
Replacing the Air Pressure Switches
Replacing the Ignition Modules
Replacing the Pressure Transducer
Replacing the Main Power Switch
Troubleshooting EEG 15X E-4 Control Overheating Error Code
Troubleshooting EEG 15X E-5 Oil Overheating Error Code
Troubleshooting EEG 15X E-6 Temperature Probe Failure Error Code
Troubleshooting EEG 15X E-10 High Limit Failure Error Code
Troubleshooting EEG 15X E-18 Level Probe Failure Error Code
Troubleshooting EEG 15X E-20A Fan Sensor Stuck On Error Code
Troubleshooting EEG 15X E-20B No Draft Check Fan Error Code
Troubleshooting EEG 15X E-20D Ignition Failure Error Code
Troubleshooting EEG 15X E-22 No Heat Error Code
Reference