Unpacking
crosshead screwdriver
The Henny Penny Heated Express Cabinet has been tested, inspected, and expertly packed to insure arrival at its destination in the best possible condition. The unit has been bolted to wooden skid. All items have been packed and taped inside of the unit. The unit is then packed inside a triple wall corrugated carton with sufficient padding to withstand normal shipping treatment.
|
NOTICE - |
Any shipping damage should be noted in the presence of the delivery agent and signed prior to his or her departure.
|

|
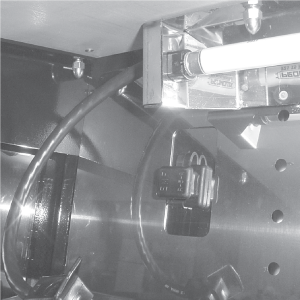
Fire Hazard To avoid fire, remove the 3 corrugated shipping supports located beneath these inserts, all visible packing material, tape, and the unpacking instructions, prior to operation. |
|
|
To avoid personal injury or equipment damage, team lift to service bottom of unit or to remove unit from location. |
To remove the Henny Penny cabinet from the carton, you should:
-
Carefully cut banding straps.
-
Open flaps of carton and remove packing.
-
Lift carton from unit.
-
Remove four bolts mounting the merchandiser to the skid.
-
Install optional legs on units if available.
-
Unpack and install shelves.
Domestic Units
-
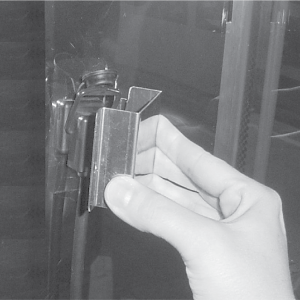
Hook the shelf brackets in the slots in the back, interior of unit. See images in Installing or Replacing the Shelf for proper slot arrangement for either 2, 3 or 4 shelf units.
-
Pull the cover off the receptacles on each side of the shelves.

-
Line up the prongs on the plug with the holes in the receptacle, and firmly push the plugs into the receptacles.
The plugs must fit firmly into the receptacles for the lights and shelf heaters to operate.
CE Units
-
Hook the shelf brackets in the slots in the back, interior of unit. . See images in Installing or Replacing the Shelf for proper slot arrangement for either 2, 3 or 4 shelf units.
-
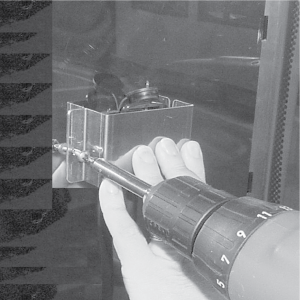
Using a crosshead screwdriver, remove the screw securing the shelf plug cover and remove the cover.
-
Pull the cover off the receptacles on each side of the shelves.
-
Line up the prongs on the plug with the holes in the receptacle, and firmly push the plugs into the receptacles.
-
Insert the tab on the shelf plug cover into the slot on the back panel and secure the cover in place using the screw previously removed.
-
-
Install fluorescent lamps. See Installing or Replacing Fluorescent Lamps.
-
Remove the bottom inserts and pull cardboard packing from around elements in bottom of unit.
-
Peel off any protective covering from the exterior of the cabinet.
-
Once the shelves and shelf lamps are installed, and the packing material removed, the unit is ready for operation.