The electric model fryer uses two heating elements.
Heating elements are available in 208, 220/240, 380 and 415 volts. Check the data plate, on the shroud behind the lid, to determine the correct voltage elements.

|
To avoid electrical shock or property damage, move the power switch to OFF and disconnect power. |
-
Remove the electrical power supplied to the unit.
-
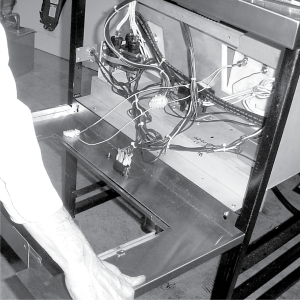
Remove the control panel.
-
Remove both side panels.
-
Remove upper screws and loosen the lower screws, to the front control shroud, and hinge it down.
Shock Hazard
To avoid electrical shock, make connections before applying power, take reading, and remove power before removing meter leads. The following checks are performed with the wall circuit breaker closed and the main power switch in the ON position.
-
Perform an amp check on one heating element at a time with the wires connected to the contactors. The 2 heaters actually have 3 small heating elements on the inside of the outer plate. It is important to check between the correct wires to obtain the accurate amp reading. The wires are labeled for your convenience.
| Wires | Power | Voltage | Amperage |
|---|---|---|---|
| L1-L3 | 8500W | 208V | 47.8 |
| L3-L2 | 8500W | 208V | 47.9 |
| L2-L1 | 8500W | 208V | 48.0 |
| L1-L2 | 8500W | 240V | 39.4 |
| L3-L2 | 8500W | 240V | 40.1 |
|
L2-L1 |
8500W |
240V |
39.9 |
Replacement
-
Drain the oil.
-
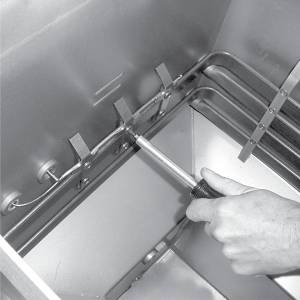
Remove the high limit bulb holder from the heating element inside the vat.
-
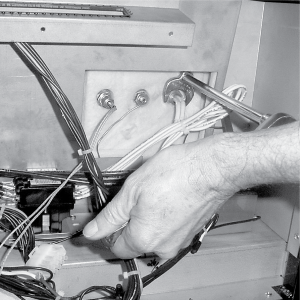
Disconnect the heating element wires from the contactors. Label each so it can be replaced in the same position on the new element.
-
Remove the heat contactor, as described in Contactors Section, to access the left side element nuts.
-
Loosen the screws on the element spreaders.
-
Slide the element spreaders to the center of the heating element.
-
Using a 7/8” crowsfoot, remove the brass nuts and washers which secure the ends of the elements through the vat wall.
-
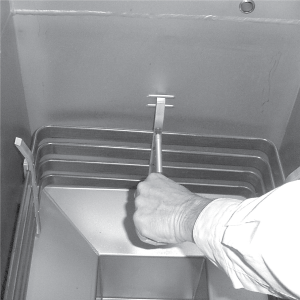
Remove the heating elements from the vat as a group by lifting the far end, and sliding them up and out towards the rear of the vat.
NOTE: Always install new rubber O rings (2) when installing heating elements.
-
Install new heating elements with new rubber O-rings mounted on terminal ends, and spreaders loosely mounted in the center of the stacked elements.
-
Replace the heating elements, terminal end first at approximately 45º angle, slipping the terminal ends through the front wall of the vat.
-
Replace the brass nuts and washers on the heating element terminals. Tighten the brass nuts to 30 foot lbs of torque.
-
Replace heat contactor.
-
Move the element spreaders from the center of the element, into a position which will spread each element apart evenly on all four sides, and tighten.
-
Replace the high limit bulb holder on the top element, and position the bulb between the top and second element midway from side to side, and tighten screw which holds the bulb in place.
-
Reconnect the wires to the appropriate terminal as labeled when they were removed.
-
Replace the front control shroud and control panel.
-
Replace side panels.
-
Connect the power cord to the wall receptacle or close wall circuit breaker.
|
|
The oil level must always be above the heating elements and at the proper oil level indicator on the rear of the vat. Failure to follow these instructions may result in fire, severe burns, and/or damage to the fryer. |
Related Content
Replacing the High Temperature Limit Control
Replacing the Temperature Probe
Electric Power Cord Routing and Attachment Installation Instructions
Troubleshooting the PFE 591 E-5 Oil Overheating Error Code
Troubleshooting the PFE 591 E-6 Temperature Probe Error Code
Troubleshooting the PFE 591 E-10 High Limit Error Code
Reference