Replacing the Water Pan Heater
11/32" socket or wrench
1/4" socket

|
Ensure unit voltage matches the water heater voltage in kit, or damage to the water heater could result. |

|
To avoid electrical shock or property damage, disconnect power before installing or servicing equipment. A qualified technician must perform the service procedures. |
|
|
HOT WATER To avoid burns, use PPE when handling overflow tube and draining unit. |
-
Disconnect or shut-off water supply.
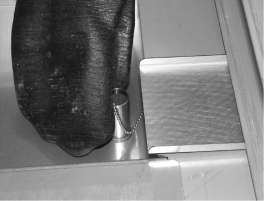
- While wearing heat resistant gloves or using a grasping tool, remove overflow tube inside of unit and allow water to drain from pan.
-
Allow unit cool.
If Loctite is applied when unit is still hot, the Loctite will set before the nuts are installed.
-
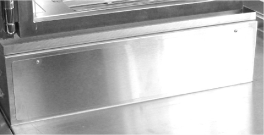
COUNTERTOP MODELS - Remove screws and both lower access panels. (Floor models continue onto step 4.)
-
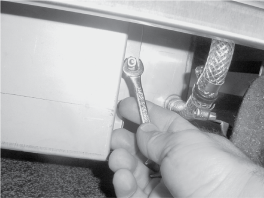
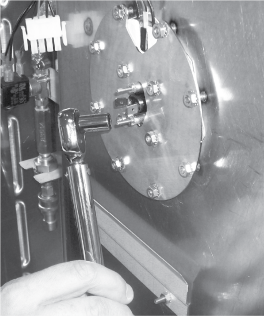
Using an 11/32" socket or wrench, remove the nuts securing the water heater cover and remove cover.
-
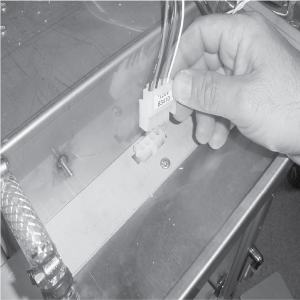
Unplug water heater and high limit wires.
-
Using a 1/4" socket, remove nuts securing the high limit and remove high limit & spacers.
-
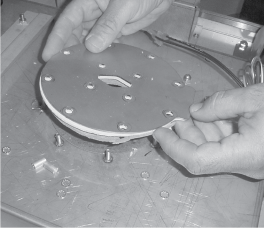
Remove the nuts securing the water heater plate and pull heater plate, insulation, water pan heater, and aluminum plate from the unit, and discard plate and insulation.
If using kits 140167, 140168 or 140169 and unit already has the lug heater (heater wires secured w/screw & nut), leave the octagon aluminum plate, remove the heater, insulation and heater plate & discard the insulation. Proceed to step 10.

-
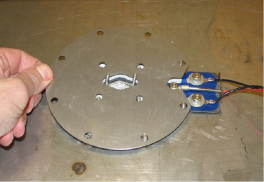
Locate the aluminum, octagon plate in the kit. Make sure the surface is free of debris and place the plate over the 4 long studs.
-
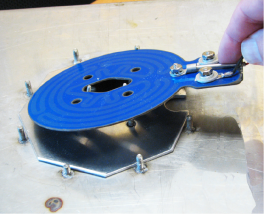
Install new heater, making sure the flat side is towards the plate, the wires are on top, and the terminal end aligns with the notch in the aluminum plate.
-
Install the new insulation from the kit, over the water pan heater, aligning the notch with the nut on the heater.
-
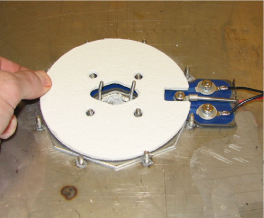
Place new cover plate from the kit, over the insulation, aligning the notch with the nut on the heater.
Kits 140167, 140168 or 140169 won't have new plate. Unit should already have notched plate. -
Apply Loctite thread locker (blue #246 MED/STR 450F) to the studs before installing nuts.
-
Locate the 12 keps nuts from the kit and place them over the studs and finger-tighten.
Kits 140167, 140168 or 140169 won't have hardware. Re-use element hardware.
- Using a torque wrench and a 11/32" socket, secure all the nuts to 7 inch lbs, following the pattern. Refer to torque wrench's manufacturer operator's instructions, if need be.
-
Apply thermal compound (HP part no. MS01-368 - 251 thermal joint compound) to bottom of high limit
- Re-install high limit with spacers, and reconnecting high limit wires and water pan heater wires to unit.
-
Re-install water heater cover and re-connect water supply & drain.
-
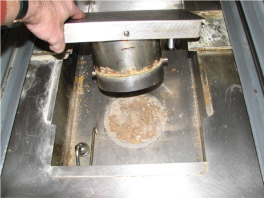
If necessary, clean & delime any lime build-up under the concentration ring.
-
Re-supply power to the unit.
-
Clear the error codes from the controls by re-intializing the controls in Tech Mode, following the procedures below:
-
Press and hold PROG button
 until "L-2 LEVEL 2", followed by, "CLOCK SET", displays.
 -
Press PROG button
3 times and "TECH", followed by, "ENTER CODE" shows in display. -
Using hidden buttons, enter code: 11221122.
-
Press PROG button
until "DO TOTAL INIT" displays. -
Press and hold Down arrow button
 until the display counts down from 3, and the display flashes "-INIT-" then "INIT*DONE".
 -
Press PROG button
and hold to exit programming and unit is now ready for use.
-
|
NOTICE - |
DO NOT overtighten. Overtightening the nuts could damage the coating on the heater, causing the heater to fail prematurely. |
Related Content
Replacing the Solenoid Valve and Water Strainer
Calibrating and Replacing Humidity Sensor
Replacing the Water Heater High Limit
Troubleshooting the Leaking Water Hose
AHC 99X Troubleshooting E-12 Water Heater Failure
AHC 99X Troubleshooting Water Level Low, Please Add Water
Reference