Replacing the Element Safety Switch
This switch cuts power to the element when the element is raised. If a constant “E-31” “HEATING ELEMENTS ARE UP”, is displayed, when the elements are lowered into the vat, check the element safety switch.

|
To avoid electrical shock or property damage, move the power switch to OFF and disconnect power. |
Checkout
-
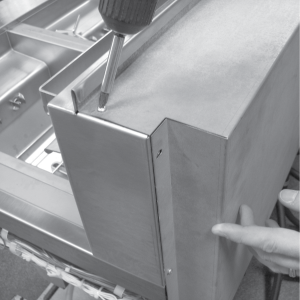
Remove control panel and hinge it down.
-
Refering to the decal on rear of the control panel, locate P9 connector (left vat-split vat) or P10 connector (full or right vat).

-
Pull connector from the panel and using a multimeter, check for continuity between two appropriate pins (labeled HEAT SWITCH). With plunger on the safety switch pushed in (element lowered), the circuit should be closed. With the element raised, the circuit is should be open. If the switch proves to be faulty, continue with replacement instructions.
Replacing
-
Remove the rear panel (9 screws).
-
Pull the wires from the switch.
-
Use crosshead screwdriver and remove the two screws securing the switch.
-
Reassemble with new switch, making sure plate pushes the switch plunger, activating the switch, and then reconnect power to the fryer.
Related Content
Replacing the Temperature Probe
LVE 10X Troubleshooting the E-5 Oil Overheating Error Code
LVE 10X Troubleshooting the E-6 Temperature Probe Failure Error Code
LVE 10X Troubleshooting the E-10 High Limit Error Code
LVE 10X Troubleshooting the E-18 Level Probe Failure Error Code
LVE 10X Troubleshooting the E-20A Fan Sensor Stuck On Error Code
LVE 10X Troubleshooting the E-21 Heat Recovery Error Code
LVE 10X Troubleshooting the E-22 No Heat Error Code
LVE 10X Troubleshooting the E-31 Elements Up Error Code
Reference