Replacing the Solenoid Valves
Each vat has a solenoid plumbed-into the oil return lines. They are normally closed, but open when power is supplied, such as, the controls are filling the vats.

|
To avoid electrical shock or property damage, move the power switch to OFF and disconnect power. |
Checkout
-
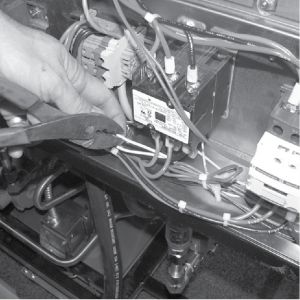
Remove control panel and hinge it down.
-
Refering to the decal on rear of control panel, locate P3 connector (left vat-split vat) or P4 connector (full or right vat).
-
Pull connector from panel and using a multimeter, take an ohm reading on the appropriate pins. If ohm reading is significantly different than the chart below, continue with replacement instructions
| 120 Volts-60Hertz | 50 Ohms |
| 220-240 Volts-50Hertz | 230 Ohms |
Replacing
-
Remove the rear panel (9 screws).
-
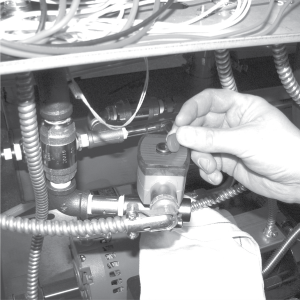
Remove the plastic retaining clip on top of the coil housing.
-
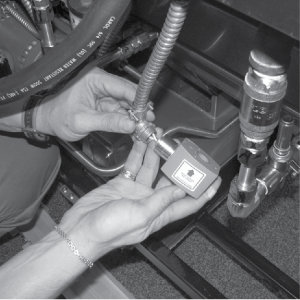
Push-down and then lift-up on name-plate and remove name-plate, cover and coil housing from solenoid stem.
-
Using a one inch wrench, loosen the fittings on both sides of solenoid stem assembly from fryer.
-
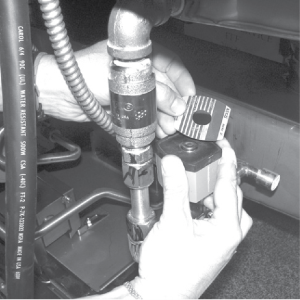
Remove elbow from solenoid stem assembly and attach it to new solenoid, using pipe sealent on the threads.
-
Remove the conduit from fryer and pull the coil assembly from the fryer.
-
Disconnect conduit at coil.
-
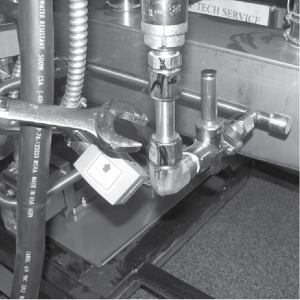
Thread the wires of new solenoid through the conduit and reattach the conduit to the fryer.
-
Wire nut the solenoid wires onto the fryer wires, and then, attach the solenoid assembly onto the fittings of the fryer.
-
Replace rear covers and reconnect power to the fryer.