Applies to:


Replacing the Drain Switch

|
Do not disconnect the ground plug. This fryer must be safely grounded or electrical shock could result. Refer to local electrical codes for correct grounding procedures. In absence of local codes with the National Electrical Code, ANSI/NFPA No. 70-(the current edition). In Canada, all electrical connections are to be made in accordance with CSA C22.1, Canadian Electrical Code Part 1, and/or local codes. |
|
NOTICE - |
Electric motor bearings are permanently lubricated and do not require attention during service of this fryer. |
Drain Switch

|
To avoid electrical shock or property damage, move the power switch to OFF and disconnect power. |
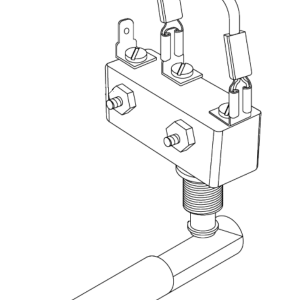
All fryer models have a drain microswitch in line with the gas control valve or heat contactor and thermostat. When the drain valve is opened to drain the oil the drain switch will open. All electrical power will shut off to the heating elements.
-
To determine if the drain switch is defective all checks should be made with the drain valve in the closed position, with the actuator pushed in.
-
Fryers with standard thermostat part 14
-
-
To replace the drain switch, remove the two screws and nuts securing switch and switch cover.

-
Label and disconnect wires.
-
Connect wires to new drain switch.
-
Position actuator and attach drain switch and switch cover with two screws and nuts.
-
Tighten nuts to 3-4 inch-pounds of torque.
-
Test to see if drain valve extension and rod actuates the switch.
|
NOTICE - |
Listen for audible click of switch while rotating drain valve extension rod. |
Related Content
Replacing The Filter Rinse Hose
Preventing Filter Pump Problems
Direct connect oil system operating instructions
Troubleshooting an E-92 Error Code
Troubleshooting the PFE 500 and 561 Not Pumping Error Code
Troubleshooting the PFE 500 and 561 E-15 Drain Open Error Code
Reference
