Replacing the High Limit Module

|
To avoid electrical shock or property damage, move the power switch to OFF and disconnect power. |
-
Remove electrical power supplied to the fryer.
-
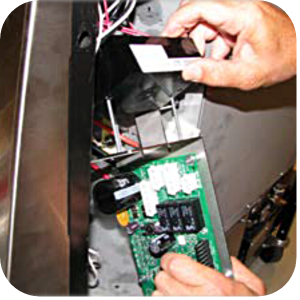
Use a cross-tip head screwdriver to remove the screws from the control board.
-
Lower the control board.
-
Use a 5/16 in. socket or wrench to remove the nuts securing the modules to the top of the bracket. Set nuts and the metal strips to the side.
-
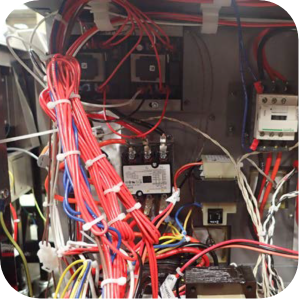
Locate the faulty module box and label the wires.
-
Disconnect the wires.
-
Slide the old module off of the studs.
-
Install the new module.
Related Content
CFE 410/420 Troubleshooting the Solid State High Limit
Temperature Probe Gauge Instructions
CFE 410/420 Troubleshooting the E-5 Oil Overheating Error Code
CFE 410/420 Troubleshooting the E-6 Temperature Probe Error Code
CFE 410/420 Troubleshooting the E-10 High Limit Error Code
CFE 410/420 Troubleshooting the E-20A Fan Sensor Stuck On Error Code
CFE 410/420 Troubleshooting the E-26 Heat Amps Locked On Error Code
CFE 410/420 Troubleshooting the E-27 Amps Too Low Error Code
CFE 410/420 Troubleshooting an E-29 Error Code
CFE 410/420 Troubleshooting the Voltage Conversion
CFE 410/420 Troubleshooting the W-1 Low Voltage Error Code
CFE 410/420 Troubleshooting the W-2 Slow Heating Error Code
CFE 410/420 Troubleshooting the W-3 Was Not Ready Error Code
CFE 410/420 Troubleshooting the W-4 Slow Cooking Error Code
CFE 410/420 Troubleshooting the W-5 Slow Cooking Error Code
CFE 410/420 Troubleshooting the W-6 Slow Cooking Error Code
CFE 410/420 Troubleshooting the W-7 Low Amps Error Code
CFE 410/420 Troubleshooting the W-9 Discard Product Error Code
CFE 410/420 Troubleshooting the E-92 24V Current Limiter Fuse Tripped Error Code
Reference