Replacing the Light Bulb

|
To avoid electrical shock or property damage, disconnect power before installing or servicing equipment. A qualified technician must perform the service procedures. |
|
|
Light bulbs and glass may be hot. Severe burns could result. Do Not attempt to access the bulb from the operator’s side of the unit. The installer cannot easily see the bulb and socket or the adjacent radiant heaters, increasing the potential shock or burn hazard. |
-
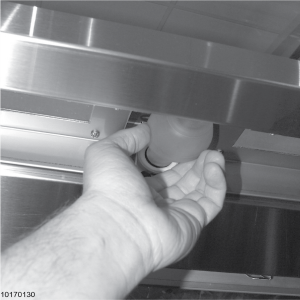
Raise the glass canopy and ensure that the gas shocks support its weight before proceeding.
-
Carefully remove the old bulb and discard.
-
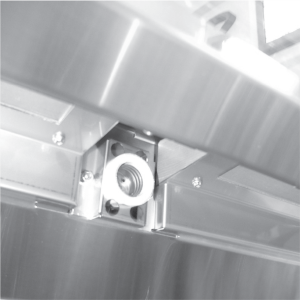
Visually inspect socket to ensure there is no debris or damage that may impede bulb installation.
-
Install the replacement bulb. Tighten using a gentle pressure.
NOTICE -
To help prevent a short bulb life:
-
Do not over-tighten the bulb. Over-tightening will damage the contact end of the bulb and compress the contact tab in the socket.
-
Do not install the bulb with the power on. During normal operation, the socket is exposed to various food related agents, such as moisture and grease. When installing a new bulb with the power on, the spark that occurs when the bulb contact touches the socket, places a deposit on the bottom of the bulb. This deposit results in a higher amp draw and shorter bulb life.
-