Applies to:

Replacing the High Limit
This is a safety, manual reset control, which senses the temperature of the oil. If the oil temperature exceeds 425°F (218°C), this switch opens and shuts off the heat to the vat. When the temperature of the oil drops to a safe operation limit, manually reset the control by pressing the reset button.
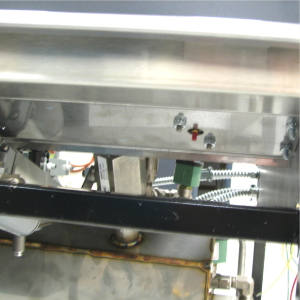
The red reset button is located behind the doors, underneath the controls; find the appropriate high limit and press the red reset button; if high limit does not reset, high limit must be replaced; If high limit resets, the oil starts heating.
Checkout

|
To avoid electrical shock or property damage, move the power switch to OFF and disconnect power. |
-
Remove electrical power supplied to the fryer.
-
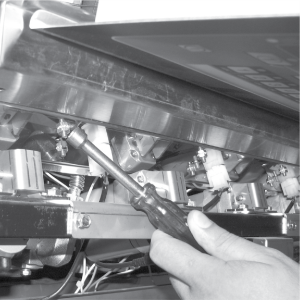
Using a crosshead screwdriver, or cordless drill, loosen the screw securing the top of the control panel and secure control panel in the slots of the shroud.
-
Open the front door, and using a 3/8 inch socket or nut-driver, remove the two nuts securing the high limit bracket to the unit.
-
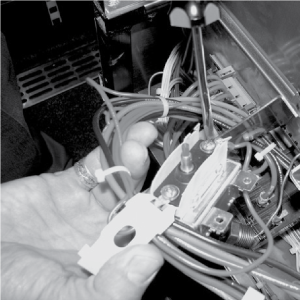
Pull the high limit and bracket from inside of control panel and remove the two screws securing the high limit to the bracket. 5/16 inch socket, remove the 6 nuts securing the board and remove it from the fryer.
-
Pull the high limit from the bracket, pull back the cardboard protector, and remove the two electrical wires from the high limit control.
-
Manually reset the control, then check for continuity between the two terminals after resetting the control. If the circuit is open, replace the control, then continue with this procedure. (If the circuit is closed, the high limit is not defective. Reconnect the two electrical wires.)
Replacing
If the tube is broken or cracked, the control opens, shutting off electrical power. The control cannot be reset.
-
Drain the oil from the vat:
-
Press and hold a button until *FILTER* *MENU* displays.
-
Then, once “1.AUTO FILTER” displays, press three times until “4.DRAIN TO PAN” displays.
-
Press √ button and “DRAIN TO PAN” “YES NO” displays.
-
Press √ button again, display shows “DRAINING”, and oil drains from vat.
-
Once oil has drained, display shows “VAT EMTY” “YES NO”. Visually check that vat is empty and press √ button, display shows “DRAIN CLOSING...” and drain closes.
-
-
Remove electrical power supplied to the fryer.
-
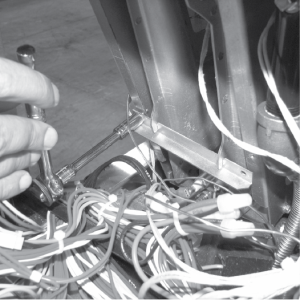
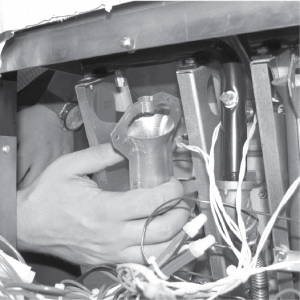
Using a 3/8 inch socket, remove the two screws securing the burner jet bracket and remove bracket.
-
Pull both burner jets from unit.
-
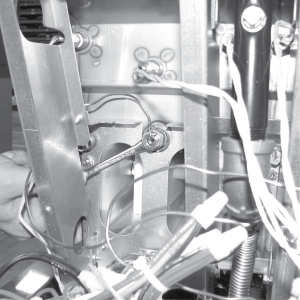
Using a 5/16 inch wrench, loosen small inside screw nut on capillary tube.
-
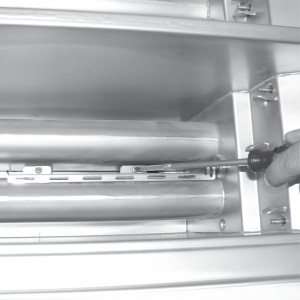
Using a crosshead screwdriver, remove the two screws the capillary bulb bracket and pull bracket from unit.
-
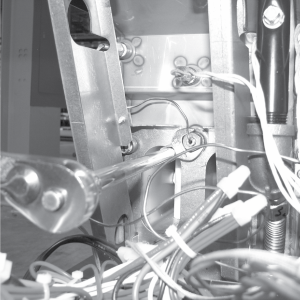
Using an 11/16 inch crows-foot remove the large high limit fitting in vat wall, and pull the high limit from inside the control area.
-
Install new high limit in reverse order and restore power to unit.
-
Fill vat by following the procedure below:
-
Press and hold a button until *FILTER* *MENU* displays.
-
Then once “1.AUTO FILTER” displays, press 4 times until “5.FILL POT FROM DRN PAN” displays.
-
Press √ button; “FILL POT FROM DRN PAN” “YES NO” displays.
-
Press √ button again, display shows “FILLING” “STOP?” and oil fills vat.
-
Press √ button again, display shows “FILL POT FROM DRN PAN” “YES NO”.
-
When vat is full, press X twice to return to normal operation.
-
For additional troubleshooting refer to the JWF Light Code Chart.
Related Content
Replacing the Temperature Probe
Replacing the Air Pressure Switch
Replacing the Ignitor and Flame Sensor
Replacing the Ignition Modules
Replacing the Pressure Transducer
LVG 10X Troubleshooting the E-5 Oil Overheating Error Code
LVG 10X Troubleshooting the E-6 Temperature Probe Error Code
LVG 10X Troubleshooting the E-10 High Limit Error Code
LVG 10X Troubleshooting the E-20A Fan Sensor Stuck On Error Code
LVG 10X Troubleshooting the E-20B No Draft Check Fan Error Code
LVG 10X Troubleshooting the E-20D Ignition Failure Error Code
Reference
