Replacing the Gas Control Valve Assembly

|
TO AVOID INJURY, PROPERTY DAMAGE, OR EXPLOSION, BEFORE REPLACING STARTING THIS PROCEDURE, DO THE FOLLOWING:
|
The gas control valve assembly controls the flow of gas to the pilot and the main burner. The valve has two 24 volt coils, which are regulated by terminals P and M on the valve. The C terminals is the common terminal. For gas flow to the pilot, 24 VAC must be present between the P and C terminals. For gas flow to the main burner, 24 VAC must be present between the M and C terminals.
-
Remove the control panel assembly.
-
Remove wires from gas control valve.
-
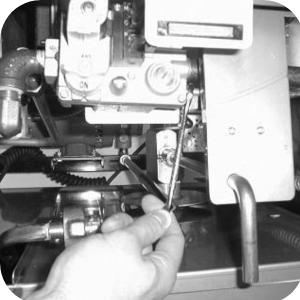
Use a 7/16 in. wrench to remove the pilot line from the gas control valve.
-
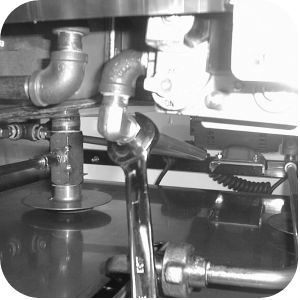
Use a 1 in. wrench to loosen the nut securing the main gas inlet line to the gas control valve.

-
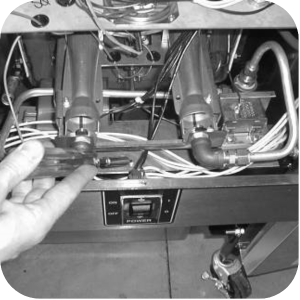
Use a 5/8 in. wrench to remove the two burner gas line fittings at the black tee fitting, located behind the control panel area.
-
Use a crosstip head screwdriver to remove the three screws securing the gas control valve bracket to the frame of the fryer behind the control panel area.
-
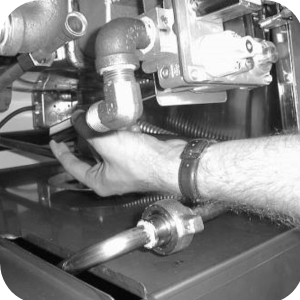
With the bracket dropped down, remove the two screws behind the bracket securing the gas control valve to the bracket.
-
Install the new gas control valve.
Related Content
Replacing the Blower Motor Assembly
Replacing Heating Contactors (Electric Only)
Replacing Heating Elements (Electric Only)
Replacing the High Limit Temperature Control (Electric Units)
Replacing the High Temperature Limit Control (Gas Units)
Replacing the Flame Sensor (Gas Units)
Replacing the Pilot / Ignitor Assembly
Replacing the Temperature Probe
OGA-OFG 32X Ignition Module Retrofit
OFG/OGA 32X Replacing Gas Valve Kit
OFE 32X Installing the Spreader Bar
OFE 32X Chick-Fil-A Element Bracket
Troubleshooting the OFG 32X Fryer Stuck in Ignition Loop
Troubleshooting the OFG 32X Fryer E-4 Control Overheating Error Code
Troubleshooting the OFE and OFG 32X Fryer E-5 Oil Overheating Error Code
Troubleshooting the OFE and OFG 32X Fryer E-6 Temperature Probe Error Code
Troubleshooting the OFE and OFG 32X Fryer E-10 High Limit Error Code
Troubleshooting the OFE and OFG 32X Fryer E-20A Fan Sensor Stuck Closed Error Code
Troubleshooting the OFG 32X Fryer E-20B Pressure Switch Stuck Error Code
Troubleshooting the OFG 32X Fryer E-20D Ignition Failure Error Code
Troubleshooting the OFE 32X Fryer E-26 Heat Amps Locked Error Code
Troubleshooting the OFE and OFG 32X Fryer E-92 24V Circuit Overload Error Code
Troubleshooting the OFE 32X Fryer W-1 Low Voltage Warning
Troubleshooting the OFE 32X Fryer W-2 Slow Heating Warning
Troubleshooting the OFE 32X Fryer W-3 Was Not Ready Warning
Troubleshooting the OFE 32X Fryer W-4 Slow Cooking Warning
Troubleshooting the OFE 32X Fryer W-5 Slow Cooking Warning
Troubleshooting the OFE 32X Fryer W-6 Slow Cooking Warning
Troubleshooting the OFE 32X Fryer W-7 Low Amps Warning
Troubleshooting the OFE 32X Fryer W-9 Discard Product Warning
Reference