Applies to:
![]()
Replacing the FSE Liquid Cleaning Pump with New Style
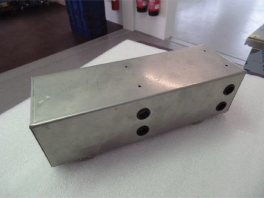
1x Rear cover for unit
1x Cleaning pump cover
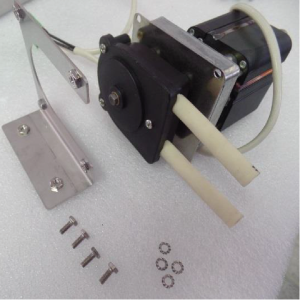
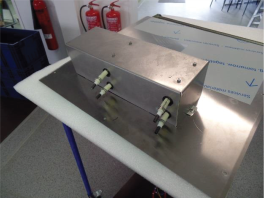
1x Liquid cleaning pump housing
2x Bracket liquid cleaning pump
2x Sleeve for liquid cleaning pump hose
4x Mounting screw for bracket liquid cleaning pump, inner hexagon style M4x10
8x Mounting screw for liquid cleaning pump, hexagon style M4x10
2x Mounting screw for liquid cleaning pump housing, flathead style M4x10
8x Washer for liquid cleaning pump
4x Double hose fitting
8x Hose clamp
Overview
Follow the procedure to convert Wendy's FSE combi oven liquid cleaning pumps to the current style.
Procedure
Preparing Unit
-
Remove rear of unit.
-
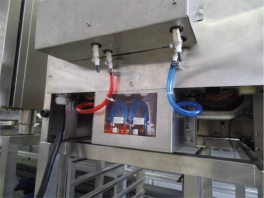
Disconnect both blue and both red hose of the liquid cleaning pumps.
-
Disconnect the wire connector from the unit to the liquid cleaning pumps (Plug XFL1).
-
Remove the current cleaning pump cover, including the two blue liquid cleaning pumps.
-
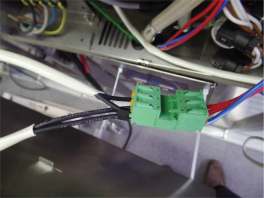
Remove the connector of the cables, which are connected to the blue cleaning pumps.
The connector will be used again.
Assembling the Housing
-
Install bracket for liquid cleaning pump to by using four hexagon style screws M4x10 and four washers. This assembly needs to be done twice!
-
Install bracket for liquid cleaning pump twice in the housing by using four inner hexagon style screws M4x10.
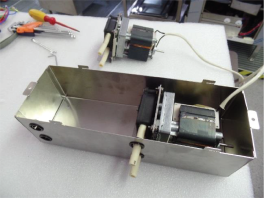
Make sure hoses are positioned without kinks through the holes.
-
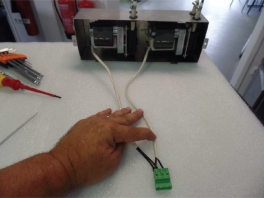
Install four double hose fitting to all four hoses of the two liquid cleaning pumps by using four hose clamps.
-
Connect cables of both liquid cleaning pumps to connector which was removed from blue pumps.
-
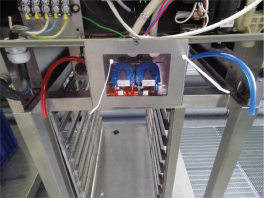
The degreaser pump G13 is placed on the right side of rear cover when mounted to the unit and view from the back.
-
The rinse aid pump G14 is placed on the left side of rear cover when mounted to the unit and view from the back.
-
Install protection hose over the pump wires.
-
Splice together one wire of each pump and place in position 1.
-
Wire of degreaser pump G13 placed in middle position 2.
-
Wire of rinse aid pump G14 placed in position 3.
-
Tie all wires together with one wire tie.
-
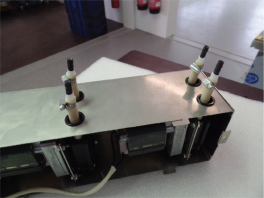
Installing a New Cleaning Pump Cover
-
Looking from the back feet red hose coming from the siphon through the left hole of the cleaning pump cover.
-
Looking from the back feet blue hose coming from the siphon through the right hole of the cleaning pump cover.
-
Make sure both hose are routed without a kink.
Assembling Rear Cover to Liquid Cleaning Housing
-
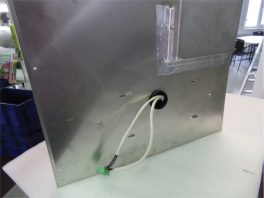
Route wire through rear cover of unit.
-
Snap housing with installed liquid cleaning pumps to rear cover.
-
Mount housing for liquid cleaning pumps with two flat head screws M4x10
Mounting Rear Cover to Unit
-
Connect wire connectors for liquid cleaning pumps on connector XFL1 by holding rear cover assembly in one hand and connecting wires with other hand.
-
Screw rear cover assembly to unit.
-
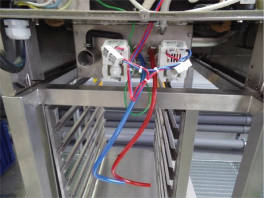
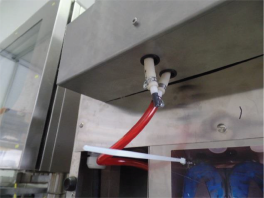
Connect red hose coming of the unit to rinse aid pump G14 to left rear hose end of pump by using one hose clamp.
-
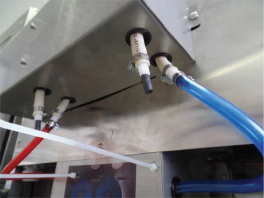
Connect blue hose coming of the unit to degreaser pump G14 to right rear hose end of pump by using one hose clamp.
-
Secure hoses with wire ties and make sure there are no kinks in the hoses.
-
Connect red hose from rinse aid bottle to left hose coming of the liquid cleaning pump G14 by using one hose clamp.
-
Connect blue hose from degreaser bottle to right hose coming of the liquid cleaning pump G13 by using one hose clamp.
-
Confirm by doing the relay test if both pumps G13 and G14 are working properly. Use a bucket of water for this test.
The pumps have no mark from the manufacturer for the running direction. The pumps are running clock wise when looking at the black front of the pump.
The cooling propeller, provided by the manufacturer, is not used since the running time of the pump is very short in this application.
Concept Information
Related Content
FlexFusion Space$aver Combiovens
Creating the Cookie and Breakfast Bars Recipe for Wendy's FlexFusion SpaceSaver Combi Ovens
Changing a Standard Six or Ten Grid Gas Unit into a Stacked, Bottom Unit
Setting Up the Grease Collection System
Replacing the FlexFusion Space$aver Plus and Team Blower Shaft Seal and Lock Washer
Troubleshooting the Wendy's FlexFusion SpaceSaver Liquid Cleaner Pump Failure
Reference
FlexFusion Space$aver and Space$aver Plus Combiovens
FlexFusion Space$aver and Space$aver Plus G2 Combiovens
FlexFusion Space$aver Team Combiovens
FlexFusion Space$aver Team G2 Combiovens
CombiOven Service Video Archive