Replacing the Gas Control Valves
The gas control valve assembly controls flow of gas to the pilot and the main burner. Valve has two 24 volt coils, which are regulated by terminals PV and MV on the valve. For gas flow to the pilot, 24 VAC must be present between the PV and COM terminals.For gas flow to the main burner, 24 VAC must be present between the MV and COM terminals.

|
To avoid electrical shock or property damage, move the power switch to OFF and disconnect power. |

|
TO AVOID INJURY, PROPERTY DAMAGE, OR EXPLOSION, BEFORE REPLACING STARTING THIS PROCEDURE, DO THE FOLLOWING:
|
-
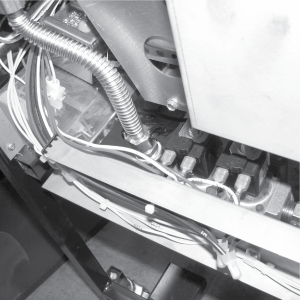
Remove the appropriate side panel and/or open the doors.
-
Label and remove wires from gas valve.
-
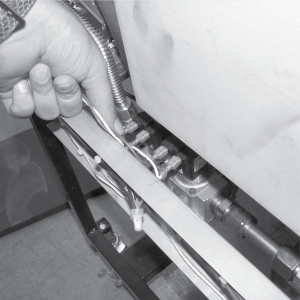
Using a 5/8 inch wrench, loosen the flexible gas line fitting.
-
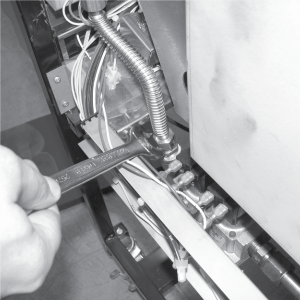
Using a 1 inch wrench, loosen the rear fitting and pull assembly from the unit.
-
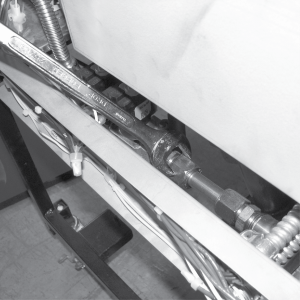
Remove the nipple from the brass elbow. With the nipple removed, the fitting will clear the gas valve body.
-
Pull fittings from gas valve and attach the fittings to new gas valve, in the same orientation.
-
Install new gas valve in reverse order.
Related Content
Replacing the Drain Valve Actuator
Replacing the Filter Motor Relay
Replacing the Filter and JIB Lights
Replacing the Filter Pan Switch
LVG 10X Troubleshooting the E-18 Level Probe Error Code
Troubleshooting the E-60 AIF Communication Failure
LVG 10X Troubleshooting the Oil Not Pumping Error Code
Reference