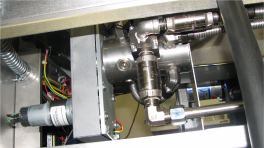
Replacing the Selector Valve
All vats are plumbed into the selector valve. It controls the flow of oil into and out of each vat. It is a rotary valve operated by a low voltage motor.

|
To avoid electrical shock or property damage, move the power switch to OFF and disconnect power. |
Replacing the Motor
-
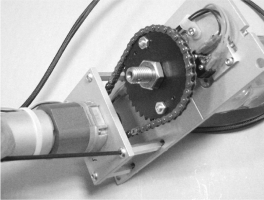
Using a 1/8 inch Allen wrench, loosen two screws and remove chain guard.

-
Using a 1/8 inch Allen wrench, remove four screws.
-
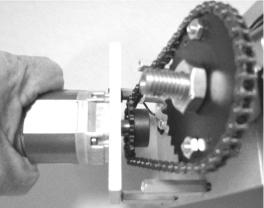
Pivot rear of motor down while lifting up to disengage motor sprocket from chain.
-
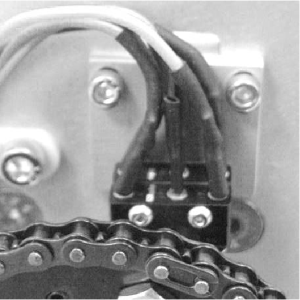
Disconnect motor lead wires at connector.
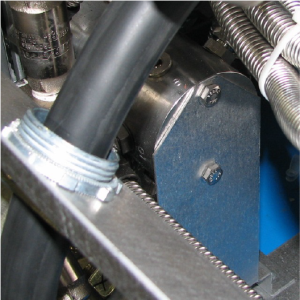
NOTICE -
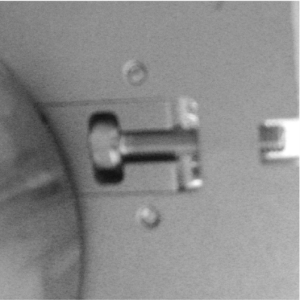
Disassembling the selector valve is not recommended. In the event that the selector valve is disassembled, the gear lever must be correctly installed as shown below.


-
Install new motor assembly in the reverse order. Torque the four screws to 30 inch pounds.
Replacing the Switches
-
Using a 1/8 inch Allen wrench, loosen two screws and remove chain guard.
-
Using a 7/64 inch Allen wrench, remove two screws and switches.
-
Install new switches assembly over adjustment screw head and into the large slot. Align mounting screw holes and install two screw finger tight.
-
Lightly push the switches bracket up against the adjustment head and hold in place. Tighten mounting screws.
Drive chain and sprockets will begin operating. Keep fingers and hands clear of moving parts or personal injury could result.
-
Move lead wires from old switches to new switches.
-
Move main power switch to on position; selector valve will perform automatic calibration.
-
Press both filter buttons at the same time for Info Mode, press left arrow twice for “13. PUMPS VALVES”, press the down arrow three times for “SEL-VALV”, press product 3 for “CALIBRAT”, and press ✓.
-
Valve will rotate two turns and dwell angles for both switches will show in the right display. Values should be between about 12.0 and 18.0. If not, adjust position of switches assembly.
-
Install chain guard and tighten retaining screws.
Replacing the Valve Assembly
-
Drain oil from all vats.
-
Disconnect lead wires at connector on rear wall of controls area and push through hole toward back of fryer.
-
Using a 15/16 inch wrench, disconnect all flexible oil lines from selector valve body fittings.
-
Using a 1 inch wrench, disconnect hard line from filter pump to elbow.
-
Using a 7/16 inch wrench, remove two mounting bolts from support at end of valve.
-
Using 1 7/16 inch wrench, remove two mounting bolts and two nuts and selector valve assembly from fryer.
-
Locate elbow and pipe plugs in ports of selector valve. Label corresponding ports in new selector valve, and remove elbow and plugs from old valve and place into labeled ports in new valve.
-
Assemble in reverse order.
Related Content
Replacing the Filter Motor Relay
Replacing the Filter Pan Switch
Replacing the Filter and JIB Lights
Repairing the Filter Pump and Motor Assembly
Replacing the Oil Level Probes
Adjusting the Drain Valve Actuator
Troubleshooting a Leaking Drain Valve
Troubleshooting an E-82 Error Code
LVE 20X Troubleshooting the Oil Not Pumping Error Code
Reference