Applies to:
![]()
![]()
![]()
![]()
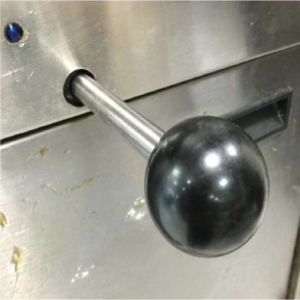
Replacing the Pull Handle
-
Basic Hand Tools
-
3/8" (10mm) wrench
-
9/16" (14mm) wrench
-
3/4" (19mm) wrench
-
3/8" (10mm) nut driver
-
Drill with crosstip bit or crosstip screwdriver
-
Flat-blade screwdriver
-
Wire cutters
-
Drain Pan Switch - Spring Lever
-
Pivot Arm
-
Drain Switch Linkage
-
Drain Rod Guide / Switch Bracket
-
Drain Rod
-
Drain Rod Stop
-
Hard Stop Bracket
-
Wire Harness
-
Clamp
-
Hardware
-
Lever Nuts
Kit number
140612,
140613
Estimated Time
30 minutes per vat

|
Shock Hazard HIGH VOLTAGE PRESENT! To avoid personal injury, this procedure should only be performed by a service technician who is trained and understands electrical safety. |

|
To avoid electrical shock or property damage, disconnect power before installing or servicing equipment. A qualified technician must perform the service procedures. |
|
|
Only perform this procedure when the unit is cool or severe burns may result. |
Follow these instructions to replace the pull handle on the EEG fryer.
-
Turn power switch off.
-
Ensure fryer is cool to the touch before moving.
-
Pull out the fryer and unplug from power source.
-
Remove side panel.

-
Unscrew pull handle knob.

-
Remove cotter pins from pull handle rod clevis pin and castle nut.
-
Remove castle nut and pull linkage arm handle off drain valve.
-
Remove bushing and spacer from pivot arm and set aside for later use.
-
Remove drain rod.
-
Remove the two nuts holding drain rod guide using 3/8 in. (10mm) wrench and discard bracket.
-
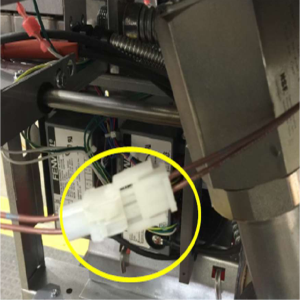
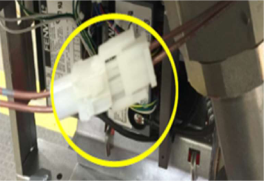
Disconnect drain plug harness.
-
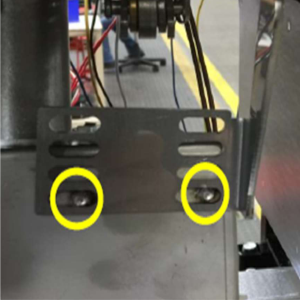
Remove drain switch bracket assembly from trough using a 3/8 in. (10mm) nut driver and discard bracket.
-
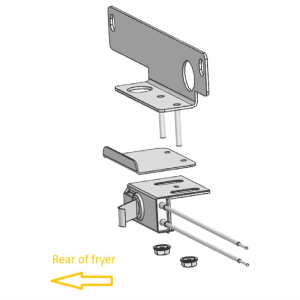
Locate drain rod guide/switch bracket from kit and install existing hardware.
-
Locate 1/2 in. and 3/4 in. snap bushings and snap into appropriate holes on bracket.
-
Locate hard stop bracket and install on switch mounting studs with lip facing up and towards rear of fryer.
-
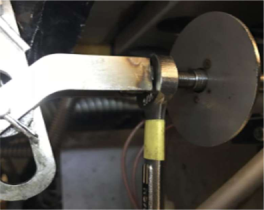
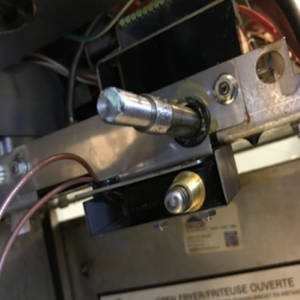
Locate new spring lever switch and install with lever facing rear of fryer. Adjust switch towards rear of fryer until slots bottom out and secure with 2 x 5/16 nuts provided in kit.
-
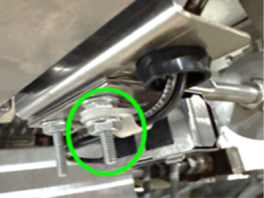
Screw existing black knob onto new drain rod from kit and insert back through hole on front of fryer.
-
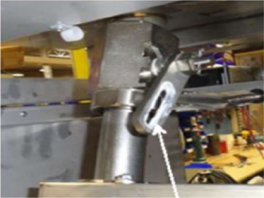
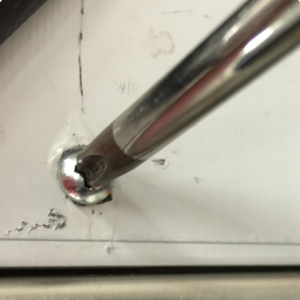
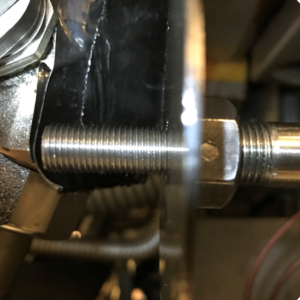
Make sure the drain rod comes through the guide plate opening as shown.
-
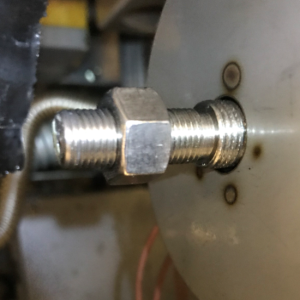
Locate the drain rod stop from kit and thread onto drain rod making sure to bottom out on rod.
-
Locate 3/8-24 nut from kit and thread onto drain rod.
-
Locate drain rod linkage from kit and thread onto drain rod.
-
Locate pivot arm from kit and install on drain valve. Thread castle nut on drain valve and tighten. Note: It may be necessary to back nut off slightly in order to align notches with hole in valve stem.
-
Locate cotter pin from kit and install through hole in valve stem.
-
Locate white lubricant grease from kit and apply to slot in pivot arm.
-
Reinstall bushing and spacer into pivot arm.
-
Connect drain rod linkage to pivot arm using clevis pin and cotter pin from kit.
-
With drain rod pulled out, adjust drain rod stop until it's hitting hard stop bracket and contacting switch.
-
Tighten nut against drain rod linkage first, then tighten drain rod stop nut.
-
Check operation to verify proper switch activation.
-
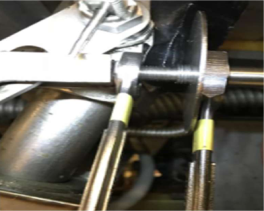
Route wires through grommet on rod guide/switch bracket.
-
Locate p-clip from kit, install on switch wires, and mount on right most stud. Secure p-clip using 5/16 nut provided in kit.
-
Locate wire harness from kit and attach to switch wires using lever nuts provided in kit.
-
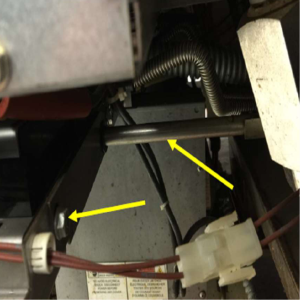
Plug drain harnessed back together.
-
Working in reverse order, complete steps 4 through 1 and return fryer to service.


![]()
Testing Spring Lever Switch
-
Turn control to the off position using either power button. (For split vats, turn the side off using the same side power button.)
-
Verify there is no oil in the drain pan and is clean.
-
Pull drain handle all the way out and allow any oil to drain down to the drain pan and push handle back in to close the drain.
-
Press and hold the P (Program) button in the top right of control for 6 to 8 seconds until you reach level 2. Tap the P button until you see Tech Mode.
-
Enter code 11221122.
-
Tap the P (Program) button until you reach T-17. You should see HDE on the screen.
-
Pull the drain handle all the way to engage the switch and close it all the way again. Make sure the "D" is showing up and disappearing. You may need to adjust the nut on the drain rod if it is not engaging/disengaging properly with switch.
-
After testing is complete, close the drain and press and hold the P (Program) button until control goes back into off position. Press and hold either F button on a full vat until you see Filter Menu. (For split vat, press and hold the same side you need to fill back up.)
-
Tap the down arrow F button until you get to step 5. Fill from pan and start the filling process by tapping the check mark button until the vat is filled, stop the process by tapping the X button and make sure all oil has been removed from drain pan (restart fill process if oil is still in pan). Tap the X button again to get the mail filter menu. Tap the down arrow F button until you see exit and filter menu by tapping on the check mark.
-
Turn vat back on for operation.