Replacing the EEG Fryer Generation 4 Selector Valve Motor
drill motor with cross tip bit
5/16th inch nut driver
1/8the inch hex key wrench
narrow and wide flat blade screwdrivers
zip ties
Kit number
185390
Overview
As part of Henny Penny’s continuous improvement efforts, we are migrating away from Gen. 3, and to Gen. 4 selector valve motors on all NEW Evolution Elite Gas (EEG) fryers, starting October 2022. Additionally, the new Gen. 4 selector valve motor should be used as a serviceable part for all existing Gen. 3 and 4 selector valve motors on EEG fryers.
Procedure
Turn the power switch to -OFF-, and then unplug the fryer from power.
Using a drill motor with cross-tip bit, remove the right-side panel and rear access panel.
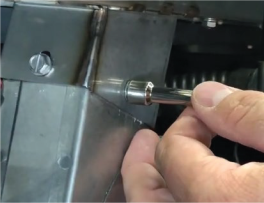
Using a 5/16th in. nut driver, remove three bolts holding the blower motor.
Remove blower motor, and then set aside.
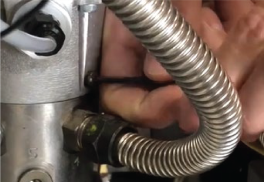
Using a 1/8th in. hex key wrench (Gen. 3) or flat blade screwdriver (Gen. 4), remove three bolts holding the selector valve motor to the valve body.
Lift the selector valve motor, and then set it to the side.
Remove the Gen. 3 O-ring from the valve body and discard.
NOTE: The new Gen. 4 selector valve motor doesn’t use an O-ring.
For Gen. 3 only, remove and discard the coupler.

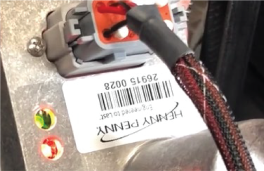
Disconnect the power supply and communication wires from the AIF board.
Reinstall the new Gen. 4 power supply and communication wires through the protection sleeve (grommet) and the AIF encloser.
Reconnect the power supply and communication wires to the AIF board.
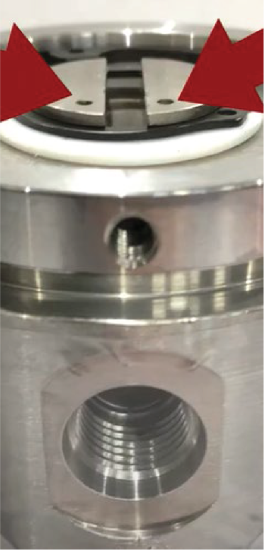
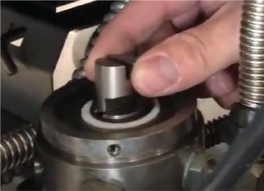
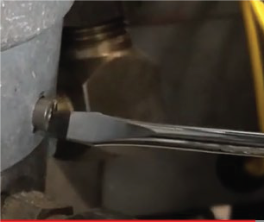
Use a wide flat blade screwdriver to turn the selector valve, ensuring the two alignment dots align with home port 10.
Connect the new communication plug (harness) into the selector valve motor. It only connects one way.
To calibrate the selector valve motor, reconnect power to the fryer, and then turn on the fryer. The motor spins and calibrates itself. A solid green and red LED light indicates the motor is done calibrating, and at the home port.
Turn the power switch to -OFF-, and then unplug the fryer from power.
Install the calibrated selector valve motor, ensuring the tang (shaft) on the motor aligns with the cutout (shaft) on the selector valve.
Use a narrow flat blade screwdriver to install the three new screws that came with the new Gen. 4 selector valve motor.
Neatly, zip (wire) tie the power supply and communication wires to the electrical conduit in the AIF enclosure.
Reinstall the blower motor, rear access panel, and side panel.
Reconnect power to the fryer, and then turn on the fryer.
Run a filter cycle to ensure the new Gen. 4 motor works correctly.
Related Content
Replacing the Filter Motor Relay
Replacing the Filter Pan Switch
Replacing the Flange Mount Filter Pump and Motor
Adjusting the Drain Valve Actuator
Troubleshooting the Check Pan Message on Evolution Elite Fryers
Troubleshooting EEG 14X E-15 Drain Open Error Code
Troubleshooting EEG 14X Not Pumping Error Code
Smart Touch Software Installation Instructions
Replacing the Flange Mount Filter Pump and Motor
Replacing the Filter Motor Relay
Replacing the Filter Pan Switch
Adjusting the Drain Valve Actuator
Troubleshooting EEG 15X E-15 Drain Open Error Code
Troubleshooting EEG 15X Oil Not Pumping Error Code
Replacing the Selector Valve Motor Encoder
Replacing the Flange Mount Filter Pump and Motor
Replacing the Hubmounted Filter Pump and Motor
Adjusting the Drain Valve Actuator
Troubleshooting Oil Not Pumping
Replacing the Bulk Fill Selector Valve
Troubleshooting EEG 16X and 24X E-15 Drain Open Error Code
Troubleshooting EEG 16X and 24X E-18 Level Probe Failure Error Code
Troubleshooting EEG 16X and 24X Oil Not Pumping Error Code
EEG E 82D Error Code Troubleshooting
Replacing the Selector Valve Motor Encoder
Replacing the Flange Mount Filter Pump and Motor
Replacing the Hubmounted Filter Pump and Motor
Adjusting the Drain Valve Actuator
Troubleshooting Oil Not Pumping
Troubleshooting the EEG 25X E-15 Drain Open Error Code
Troubleshooting the EEG 25X Oil Not Pumping Error Code
Reference
EEG 16X and 24X Plumbing Diagram