Replacing the Blower

|
To avoid electrical shock or property damage, move the power switch to OFF and disconnect power. |
Removing
-
Remove electrical power supplied to the unit.
-
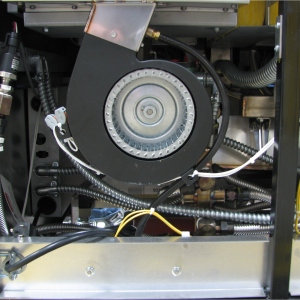
Loosen four screws on lower shroud and remove the lower back shroud.
-
Using a crosshead screwdriver, remove the two screws that secure the blower to the flue. One screw is located on the back side of the flue.
-
Cut zip ties that are holding the wires to the blower. Remove wirenuts from the wires.
-
Remove blower.
-
Reconnect new blower wires to the existing wires with wirenuts.
-
Tighten the new blower onto the flue with the two screws.
-
Zip tie wires back to the blower.
Installing
-
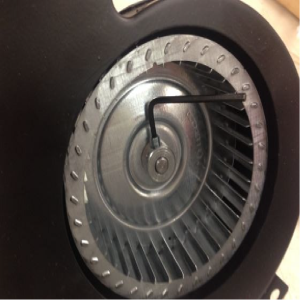
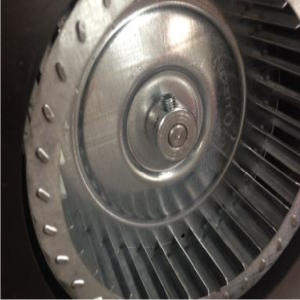
Loosen set screw using a hex-key.
-
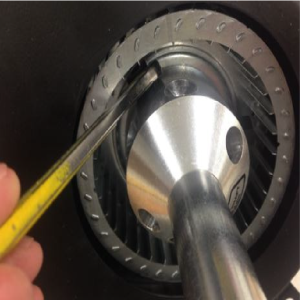
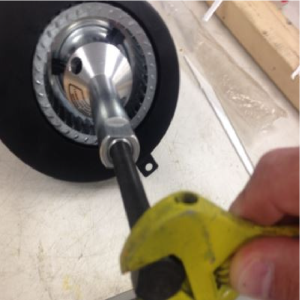
Attach wheel puller to OD of wheel hub by tighten 3 hex head bolts down with 1/ 2" wrench, making sure to keep the puller centered along the wheel/shaft axis.
-
Turn screw to remove the wheel from the motor shaft.
-
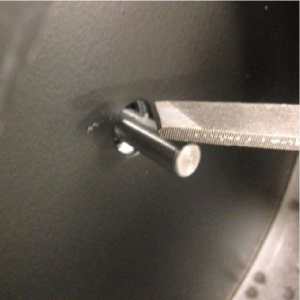
File down the burr on the shaft left by the set screw, to allow wheel to slide onto shaft freely.
-
Install wheel with hub set to end of shaft and tighten set screw.
-
Turn on blower and verify that pressure is 1.7 inwc at 60 Hz (1.4 inwc at 50 Hz) or greater.
- If less than 1.7 inwc at 60 Hz (1.4 inwc at 50 Hz) verify that flue is not obstructed and clean as needed to achieve 1.7 inwc.
Related Content
Replacing the High Limit Thermocouple
Replacing the High Limit Control
Replacing the Temperature Probe
Replacing the Gas Valve Solenoid Coil
Troubleshooting the Solid State High Limit
LVG 20X Troubleshooting the E-5 Oil Overheating Error Code
LVG 20X Troubleshooting the E-6 Temperature Probe Fail Error Code
LVG 20X Troubleshooting the E-10 High Limit Error Code
LVG 20X Troubleshooting the E-20A Fan Sensor Stuck On Error Code
LVG 20X Troubleshooting the E-20B No Draft Check Fan Error Code
LVG 20X Troubleshooting the E-20D Ignition Failure Error Code
LVG 20X Troubleshooting the E-22 No Heat Error Code
Reference