Replacing the Temperature Probe
-
Drain oil from the vat:

To avoid electrical shock or property damage, move the power switch to OFF and disconnect power.
-
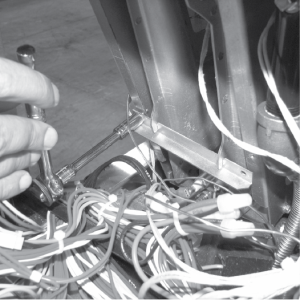
Using a 3/8 inch socket, remove two screws securing the burner jet bracket and remove bracket.
-
Pull both burner jets from unit.
-
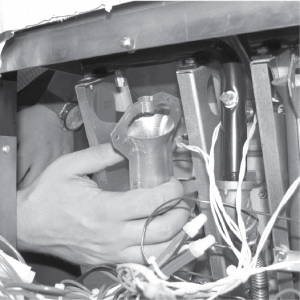
Using a 1/2 inch wrench, remove nut on compression fitting, and remove the temperature probe from the vat.
-
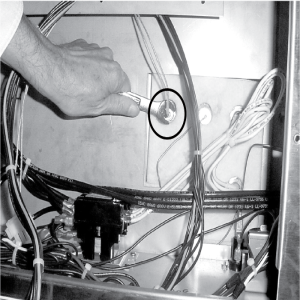
Using terminal extractor, remove probe terminals from connector and remove probe from unit.
-
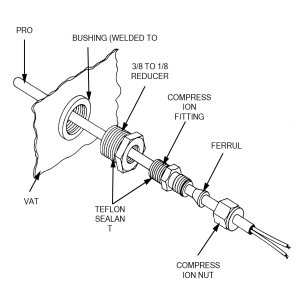
Place nut and new ferrule on the new temperature probe and insert temperature probe into the compression fitting.

-
Place gauge against vat wall as shown.
-
Push temperature probe through until it makes contact with gauge.
(missing or bad snippet) Tighten temperature probe in place.
Connect new temperature probe to connector and fasten connector onto control panel.
Replace control panel and reconnect power to vat.
Fill vat by
Press and hold a Filter button until *FILTER* *MENU* displays.
Then once “1.AUTO FILTER” displays, press four times until “5.FILL POT FROM DRN PAN” displays.
Press √ button; “FILL POT FROM DRN PAN” “YES NO” displays.
Press √ button again, display shows “FILLING” “STOP?” and oil fills vat.
Press √ button again, display shows “FILL POT FROM DRN PAN” “YES NO”. When vat is full, press X twice to return to normal operation.
Related Content
Replacing the High Limit Thermocouple
Replacing the High Limit Control
Replacing the Gas Valve Solenoid Coil
Troubleshooting the Solid State High Limit
LVG 20X Troubleshooting the E-5 Oil Overheating Error Code
LVG 20X Troubleshooting the E-6 Temperature Probe Fail Error Code
LVG 20X Troubleshooting the E-10 High Limit Error Code
LVG 20X Troubleshooting the E-20A Fan Sensor Stuck On Error Code
LVG 20X Troubleshooting the E-20B No Draft Check Fan Error Code
LVG 20X Troubleshooting the E-20D Ignition Failure Error Code
LVG 20X Troubleshooting the E-22 No Heat Error Code
Reference