Replacing the Heating Elements (Electric)
flat blade screwdriver
ohmmeter or multimeter
Crosstip screwdriver required
Heating elements are available for 208 and 230 voltage. Check data plate to determine correct voltage.

|
To avoid electrical shock or property damage, move the power switch to OFF and disconnect power. |
Checkout
If the oil temperature recovery is very slow or at a slower rate than required, this may indicate defective heating element(s). An ohmmeter quickly indicates if the elements are shorted or open.
-
Remove electrical power supplied to the unit.
-
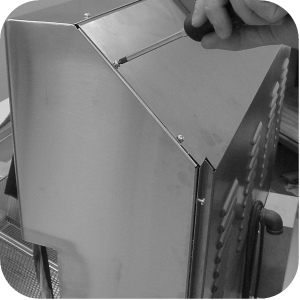
Remove the rear cover.
-
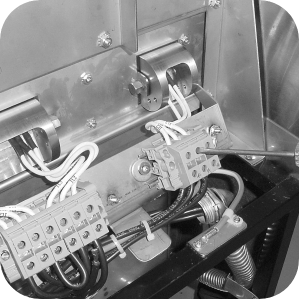
Use a flat-head screwdriver to remove the appropriate wires from the terminal blocks.
-
Perform an ohm check on one element at a time, with wires disconnected. The 2 elements actually have 3 small heating elements inside the outer plate. It's important to check between the correct wires to obtain an accurate ohm reading. The wires are labeled for conveniences. If resistance is not within tolerance, replace the element.
| Wire Nos. | Volts | Watts | Ohms (cold) |
|---|---|---|---|
| 1L1 to 1L1 | 208 | 11000 | 11.7 |
| 1L2 to 1L2 | 208 | 11000 | 11.7 |
| 1L3 to 1L3 | 208 | 11000 | 11.7 |
| 1L1 to 1L1 | 240 | 11000 | 15.7 |
| 1L2 to 1L2 | 240 | 11000 | 15.7 |
| 1L3 to 1L3 | 240 | 11000 | 15.7 |
Replacing
-
Drain the oil from the vat.
-
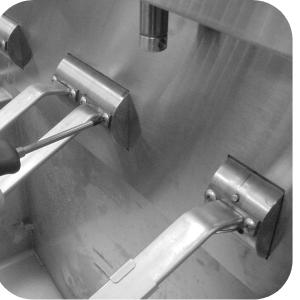
Remove the high limit bulb holder from the heating element inside the vat.
See Replacing the High Limit Temperature Control (Electric Section).
-
Use a crosstip head screwdriver to remove the screws securing the element to the element hinges.
-
Pull element from fryer and replace with new element.
-
Connect the power cord to the wall receptacle or close wall circuit breaker.
-
Replace the oil in the vat.
-
Unit is ready for operation.
Related Content
Replacing the Heating Contactors (Electric)
Replacing the High Temperature Limit Control (Electric)
Replacing the Temperature Probe (Electric)
Replacing the Flame Sensor / Pilot / Ignitor Assembly (Gas)
Replacing the High Temperature Limit Control (Gas Units)
Replacing the Temperature Probe (Gas)
Replacing the Gas Control Valve
Troubleshooting the OFG 34X Fryer Stuck in Ignition Loop
Troubleshooting the OFG 34X E-4 Control Overheating Error Code
Troubleshooting the OFE 34X E-5 Oil Overheating Error Code
Troubleshooting the OFG 34X E-5 Oil Overheating Error Code
Troubleshooting the OFE 34X E-6 Temperature Probe Open Error Code
Troubleshooting the OFG 34X E-6 Temperature Probe Open Error Code
Troubleshooting the OFE 34X E-10 High Limit Error Code
Troubleshooting the OFG 34X E-10 High Limit Error Code
Troubleshooting the OFE 34X E-20A Fan Sensor Stuck Closed Error Code
Troubleshooting the OFG 34X E-20A Fan Sensor Stuck Closed Error Code
Troubleshooting the OFG 34X E-20B Pressure Switch Stuck Open or Blower Failure Error Code
Troubleshooting the OFG 34X E-20D Ignition Failure Error Code
Troubleshooting the OFE 34X E-92 24v Circuit Overload Error Code
Troubleshooting the OFG 34X E-92 24v Circuit Overload Error Code
Reference