Replacing the Temperature Probe (Gas)
1/2 in. wrench
The temperature probe relays the actual oil temperature to the control board. If it becomes disabled, "E06" will show in the display. Also, if the oil temperature is out of calibration by more than 10°F or C° the probe should be replaced. An Ohm check can be performed as well. See chart.
| Temperature (Fahrenheit) | Temperature (Celsius) | Resistance Ohms |
|---|---|---|
| 50 | 10,00 | 1 039,02 |
| 60 | 15,56 | 1 060,65 |
| 70 | 21,11 | 1 082,24 |
| 80 | 26,67 | 1 103,80 |
| 90 | 32,22 | 1 125,32 |
| 100 | 37,78 | 1 146,81 |
| 110 | 43,33 | 1 168,26 |
| 120 | 48,89 | 1 189,67 |
| 130 | 54,44 | 1 211,05 |
| 140 | 60,00 | 1 232,39 |
| 150 | 65,56 | 1 253,70 |
| 160 | 71,11 | 1 274,97 |
| 170 | 76,67 | 1 296,20 |
| 180 | 82,22 | 1 317,40 |
| 185 | 85,00 | 1 327,99 |
| 190 | 87,78 | 1 338,57 |
| 200 | 93,33 | 1 359,69 |
| 210 | 98,89 | 1 380,79 |
| 212 | 100,00 | 1 385,00 |
| 220 | 104,44 | 1 401,84 |
| 230 | 110,00 | 1 422,86 |
| 240 | 115,56 | 1 443,85 |
| 250 | 121,11 | 1 464,79 |
| 260 | 126,67 | 1 485,71 |
| 270 | 132,22 | 1 506,58 |
| 280 | 137,78 | 1 527,43 |
| 290 | 143,33 | 1 548,23 |
| 300 | 148,89 | 1 569,00 |
| 310 | 154,44 | 1 589,73 |
| 320 | 160,00 | 1 610,43 |
| 325 | 162,78 | 1 620,77 |
| 330 | 165,56 | 1 631,09 |
| 340 | 171,11 | 1 651,72 |
| 350 | 176,67 | 1 672,31 |
| 360 | 182,22 | 1 692,86 |
| 365 | 185,00 | 1 703,13 |
| 370 | 187,78 | 1 713,38 |
| 380 | 193,33 | 1 733,87 |
| 390 | 198,89 | 1 754,31 |
| 400 | 204,44 | 1 774,72 |
| 410 | 210,00 | 1 795,10 |
| 420 | 215,56 | 1 815,44 |
| 430 | 211,11 | 1 835,74 |
| 440 | 226,67 | 1 856,01 |

|
To avoid electrical shock or property damage, move the power switch to OFF and disconnect power. |
-
Remove electrical power supplied to the unit.
-
Drain oil from the vat.
-
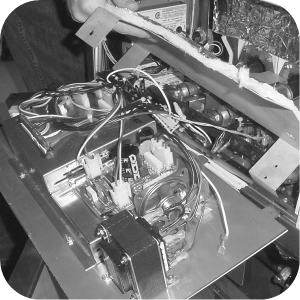
Remove the control panel and heat shield from control area.
-
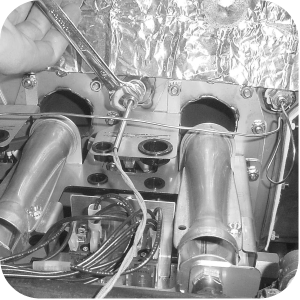
Use a 1/2 in. wrench to remove the nut on the compression fitting.
-
Remove the probe from the vat.
-
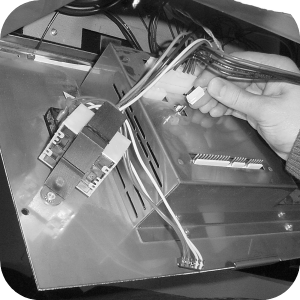
Disconnect wire connector from the control panel.
-
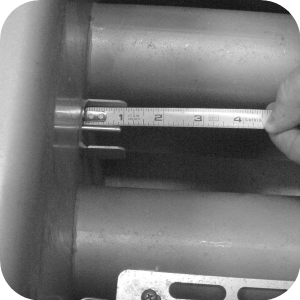
Place the nut and new ferrule on the new probe and insert the probe into the compression fitting until it extends 1 in. or 2.54 cm into the vat.

Excess force will damage the temperature probe.
-
Tighten hand tight and then a half turn with a wrench.
-
Connect new probe to PC board and replace control panel.
-
Replace oil and turn power on to check fryer.
Related Content
Replacing the Heating Contactors (Electric)
Replacing the Heating Elements (Electric)
Replacing the High Temperature Limit Control (Electric)
Replacing the Temperature Probe (Electric)
Replacing the Flame Sensor / Pilot / Ignitor Assembly (Gas)
Replacing the High Temperature Limit Control (Gas Units)
Replacing the Gas Control Valve
Troubleshooting the OFG 34X Fryer Stuck in Ignition Loop
Troubleshooting the OFG 34X E-4 Control Overheating Error Code
Troubleshooting the OFE 34X E-5 Oil Overheating Error Code
Troubleshooting the OFG 34X E-5 Oil Overheating Error Code
Troubleshooting the OFE 34X E-6 Temperature Probe Open Error Code
Troubleshooting the OFG 34X E-6 Temperature Probe Open Error Code
Troubleshooting the OFE 34X E-10 High Limit Error Code
Troubleshooting the OFG 34X E-10 High Limit Error Code
Troubleshooting the OFE 34X E-20A Fan Sensor Stuck Closed Error Code
Troubleshooting the OFG 34X E-20A Fan Sensor Stuck Closed Error Code
Troubleshooting the OFG 34X E-20B Pressure Switch Stuck Open or Blower Failure Error Code
Troubleshooting the OFG 34X E-20D Ignition Failure Error Code
Troubleshooting the OFE 34X E-92 24v Circuit Overload Error Code
Troubleshooting the OFG 34X E-92 24v Circuit Overload Error Code
Reference