Replacing the High Temperature Limit Control (Electric)
screwdriver
multimeter
This high temperature control is a safety, manual reset control, which senses the temperature of the oil. If the oil temperature exceeds 425°F (218°C), this switch opens and shuts off heat to the vat, and E10 displays on control.
When the temperature of the oil drops to a safe operation, reset the high limit by pressing the reset button. The reset button is located behind the vat, in the element hinge. A small instrument, such as a crosshead screwdriver, or Allen wrench must be used to reset the high limit. This allows heat to be supplied to the vat once again.
Before replacing a high temperature limit control, check to see that its circuit is closed.
Checkout

|
To avoid electrical shock or property damage, move the power switch to OFF and disconnect power. |
-
Remove electrical power supplied to the unit.
-
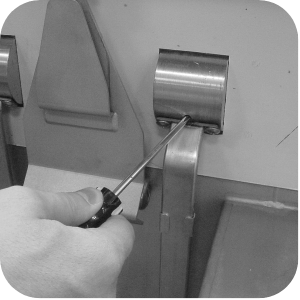
Remove rear cover of fryer.
-
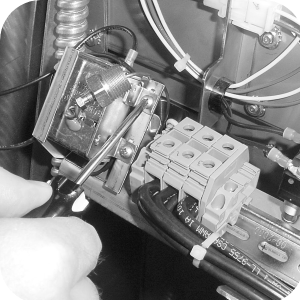
Remove the two screws securing the high limit to the bracket and pull high limit from bracket.
-
Pull back cardboard cover and remove the two electrical wires from the high temperature limit control.
-
Manually reset the control, then check for continuity between the two terminals after resetting the control. If the circuit is open, replace the control, then continue with this procedure. (If the circuit is closed the high limit is not defective. Reconnect the two electrical wires.
Replacement
|
|
To avoid electrical shock or property damage, move the power switch to OFF and disconnect power. |

|
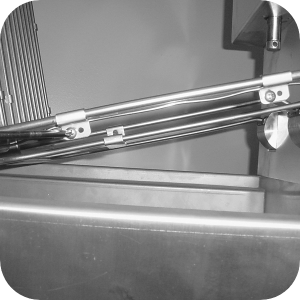
Ensure capillary bulb of high limit is located behind capillary bulb of thermostat. Both capillary bulbs and bulb holders should be positioned as not to interfere with basket or when cleaning the vat wall, or damage to capillary tube could result. |
|
|
Shock Hazard To avoid electrical shock, the capillary tube should never touch electrical wires or terminals. |
-
Drain the oil from the vat.
-
Remove capillary from brackets on upper part of element.
-
Remove capillary bulb from bulb holder inside the vat.
-
Straighten the capillary tube, and pull capillary tube through the hole in the hole in the element hinge, from the rear of the fryer.
-
Remove the defective control from the fryer.
-
Straighten the capillary tube on the new high limit.
-
Thread the capillary tube through the hole in the element hinge.
-
Reattach the capillary to the brackets on the upper and lower parts of the elements.
-
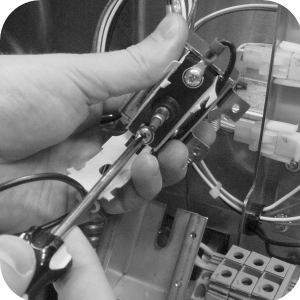
Connect wires to new high limit body and fasten to bracket.
-
Use the two screws removed in the checkout to fasten the bracket.
-
Ensure red reset button lines up with the plunger that inserts into the element hinge.
-
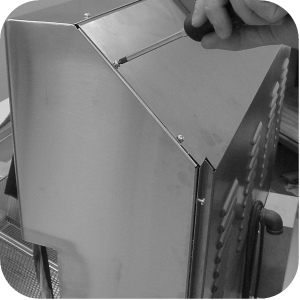
Re-install the rear cover and unit is now ready for use.
Related Content
Replacing the Heating Contactors (Electric)
Replacing the Heating Elements (Electric)
Replacing the Temperature Probe (Electric)
Replacing the Flame Sensor / Pilot / Ignitor Assembly (Gas)
Replacing the High Temperature Limit Control (Gas Units)
Replacing the Temperature Probe (Gas)
Replacing the Gas Control Valve
Troubleshooting the OFG 34X Fryer Stuck in Ignition Loop
Troubleshooting the OFG 34X E-4 Control Overheating Error Code
Troubleshooting the OFE 34X E-5 Oil Overheating Error Code
Troubleshooting the OFG 34X E-5 Oil Overheating Error Code
Troubleshooting the OFE 34X E-6 Temperature Probe Open Error Code
Troubleshooting the OFG 34X E-6 Temperature Probe Open Error Code
Troubleshooting the OFE 34X E-10 High Limit Error Code
Troubleshooting the OFG 34X E-10 High Limit Error Code
Troubleshooting the OFE 34X E-20A Fan Sensor Stuck Closed Error Code
Troubleshooting the OFG 34X E-20A Fan Sensor Stuck Closed Error Code
Troubleshooting the OFG 34X E-20B Pressure Switch Stuck Open or Blower Failure Error Code
Troubleshooting the OFG 34X E-20D Ignition Failure Error Code
Troubleshooting the OFE 34X E-92 24v Circuit Overload Error Code
Troubleshooting the OFG 34X E-92 24v Circuit Overload Error Code
Reference