Replacing the Thermostat
Removing and Reinstalling the Thermostat

|
To avoid electrical shock or property damage, disconnect power before installing or servicing equipment. A qualified technician must perform the service procedures. |
-
Remove electrical power supplied to the fryer.
-
Drain the oil from the vat.
-
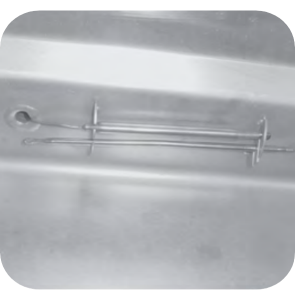
Remove the thermostat sensing bulb from the bulb holder inside the fryer.
-
Place your thumb at the bend in the capillary tube, where it comes into the vat and straighten the bulb. The bulb should be extending out into the vat.
-
Remove the two screws which secure the control panel to the frame to the fryer.
-
Lift the panel up and off the metal flanges.

-
With the door of the fryer closed, put the bottom edge of the control panel in the slot between the door and the frame of the fryer
-
Locate the thermostat on the back of the panel.
-
Remove the thermostat on the back of the panel.
-
Remove the thermostat knob on the front of the control panel.
-
Remove the small inside screw nut, which holds the capillary line.
-
Remove the large screw nut.
-
Label the wire connections to the thermostat for the correct identification when the new thermostat is installed.
-
Disconnect the wires.
-
Remove the defective thermostat.
-
Install the new thermostat.
-
Connect the wires to the new thermostat. Ensure not to cross the wires or thermostat will not operatre properly.
-
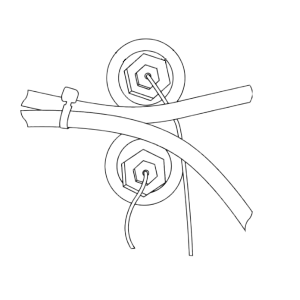
Uncoil the capillary tube.
-
Insert the bulb through the wall or the vat.
Installing the Capillary Tube
|
NOTICE - |
To avoid equipment damage, do not cross the wires on the thermostat. |
|
|
To avoid electrical shock or other injury, the capillary line must run under and away from all electrical power wires. The tube must never be in contact with the electrical power wires or terminals. |

|
Do not bend the capillary tube where it connects to the sensing bulb or damage to capillary will result. |
-
Install the thermostat fitting into the wall of the vat and tighten.
-
Replace the thermostat sensing bulb into the mounting bracket. Ensure not to bend the capillary tube where it connects to the sensing bulb or damage to capillary will result.
-
Pull the excess capillary tube from the inside of the vat.
-
Insert and tighten the inside screw nut into the thermostat.
-
Install the two screws on the front of the control panel, which will secure the thermostat to the back of the panel.
-
Install thermostat bezel.
-
Install the thermostat knob.
-
Secure the control panel with the 4 screws.
-
Reconnect power to the fryer.
-
Calibrate the thermostat and unit is ready for use.
Related Content
Replacing the High Temperature Limit Control
Calibrating The Standard Single Stage Thermostat
Replacing the Temperature Probe
Replacing the Heating Elements
Replacing the Heating Contactors
Replacing the Main Power Switch
Temperature Probe Gauge Instructions
Troubleshooting the PFE 500 and 561 E-5 Oil Overheating Error Code
Troubleshooting PFE 561 E-6 Temperature Probe Error Code
Troubleshooting PFE 561 E-10 High Limit Error Code
Troubleshooting PFE 500 and 561 E-26 Heat Amps Locked On Error Code
Troubleshooting an E-92 Error Code
Troubleshooting PFE 561 E-92 24V Current Limiter (Fuse) Trip Error Code
Troubleshooting Oil Melting or Heating Slowly
Troubleshooting PFE 500 W-1 Low Voltage Warning
Troubleshooting PFE 500 W-2 Slow Heating Warning
Troubleshooting PFE 500 W-3 Was Not Ready Warning
Troubleshooting PFE 500 W-4 Slow Cooking Warning
Troubleshooting PFE 500 W-5 Slow Cooking Warning
Troubleshooting PFE 500 W-6 Slow Cooking Warning
Troubleshooting PFE 500 W-9 Discard Product Warning
Reference