Replacing the Solenoid Valves
Each vat has a solenoid plumbed-into the oil return lines. They are normally closed, but open when power is supplied, such as, the controls are filling the vats.
Checkout

|
To avoid electrical shock or property damage, move the power switch to OFF and disconnect power. |
-
Remove control panel and hinge it down.
-
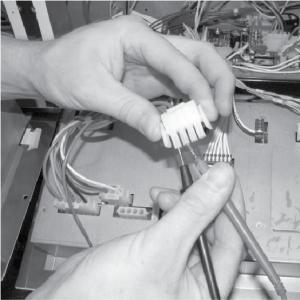
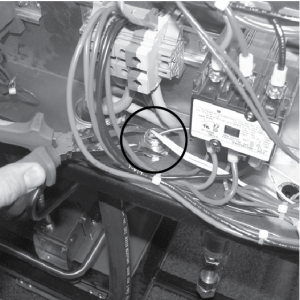
Referring to the decal on the rear of the control panel, locate P3 connector (left vat-split vat) or P4 connector (full or right vat).
-
Pull the connector from the panel and using a multimeter, take an ohm reading on the appropriate pins. If ohm reading is significantly different than the chart below, continue with replacement instructions.
120 VAC, 60 Hz 50 Ohms 220-240 VAC, 50 Hz 230 Ohms
Replacing
-
Remove the rear panel (nine screws).
-
Remove the plastic retaining clip on top of the coil housing.
-
Push-down and then lift-up on name-plate and remove the nameplate, cover and coil housing from solenoid stem.
-
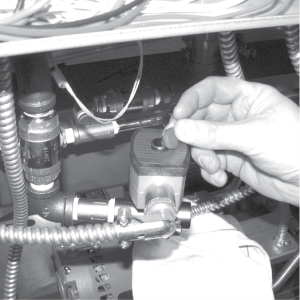
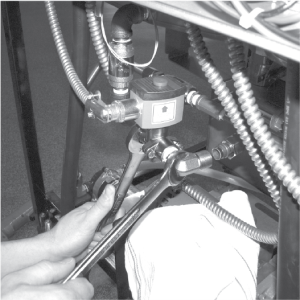
Using a 1 inch wrench, loosen the fitting on the right side of the solenoid.
-
Pull the elbow away from the 1 inch nut, and using a 1-1/16 inch wrench or adjustable wrench, hold the solenoid in place while using another wrench to remove the elbow from the solenoid. Attach elbow to new solenoid, using pipe sealant on the threads.
-
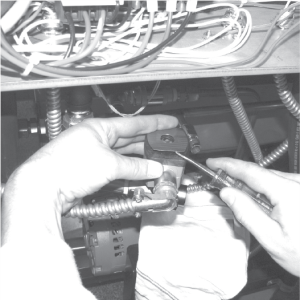
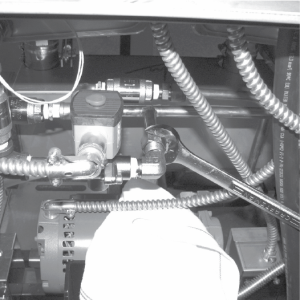
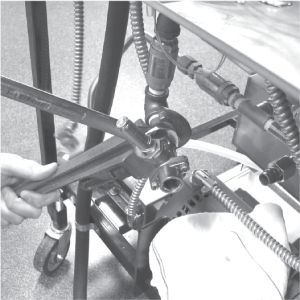
Pull the coil housing from the solenoid stem. Hold the pipe nipple in place with a pipe wrench and using a 1-1/16 inchwrench or adjustable wrench, remove the solenoid from the nipple.
-
Remove the conduit from the fryer and pull the coil assembly from the fryer.
-
Disconnect conduit at coil.
-
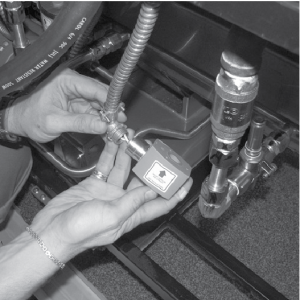
Thread the wires of the new solenoid through the conduit and reattach the conduit to the fryer.
-
Wire nut the solenoid wires onto the fryer wires, and then, attach the solenoid assembly onto the fittings of the fryer.
-
Replace rear cover and reconnect power to the fryer.
Related Content
Replacing the Flange Mount Filter Pump and Motor
Replacing the Filter Motor Relay
Replacing the Filter Pan Switch
Replacing the Oil Level Probes
Replacing the Drain Rod Microswitch
Replacing the Express Filter PC Board
Adjusting the Drain Valve Actuator
Troubleshooting the Check Pan Message on Evolution Elite Fryers
Troubleshooting EEE 15X Oil Not Pumping Error Code
Troubleshooting EEE 15X E-15 Drain Open Error Code
Reference