Replacing the Deadweight Valve

|
To avoid personal injury or property damage, before starting this procedure, move the main power switch to the off position. Disconnect the main circuit breakers at the circuit breaker box or unplug service cord from wall receptacle. |
Deadweight Valve
|
|
To avoid severe burns, do not remove deadweight cap while operating fryer. |
|
|
To avoid severe burns, do not tamper with safety relief valve while operating fryer. |
|
|
Burn Risk To avoid serious personal injury, keep body parts away from safety valve exhaust. |
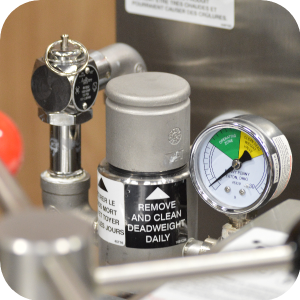
The Deadweight valve and safety relief valve are located side-by-side at the back of the unit. The valve next to the pressure gauge is operating control valve and the other valve is a 14 1/2 lb. safety relief valve. Valves will not work properly when Operating Zone is indicated on the gauge by the pointer. The gauge pointer should not normally exceed the operating zone. At 14 1/2 psi the safety relief valve opens to release stem pressure from the vat.
Cleaning Steps
-
Clean the deadweight valve at the end of each day.
-
Turn the fryer off and release all the pressure.
-
Open the lid and then remove the deadweight valve cap and deadweight.
-
Place both the cap and weight in hot detergent water and clean. Ensure to thoroughly clean inside cap, weight seal and around the deadweight orifice.
-
Rinse thoroughly with hot water.
-
Dry parts and replace immediately to prevent damage or loss.