Applies to:
ALL CUSTOMERS
Installing HHC Vent Motor Retrofit
-
Basic hand tools
-
Needle nose pliers
-
Vent motor
-
Mounting screws and nuts
Kit number
140977
Estimated Time
30 minutes
Follow the steps below to properly install the HHC vent motor retrofit and ensure optimal performance and safety of the unit.

|
Only perform this procedure when the unit is cool or severe burns may result. |
Removing Vent Motor
-
Turn power switch off.
-
Ensure cabinet is cool to the touch before moving.
-
Pull out the cabinet and unplug from power source.
-
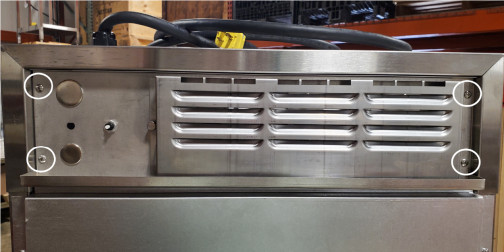
Remove the four crosstip screws on the rear vent shroud.
-
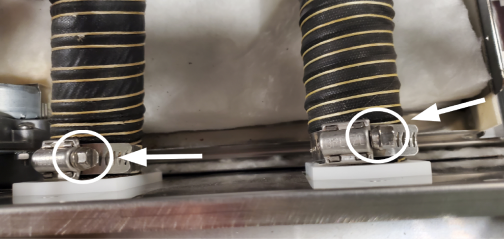
Carefully pull away to access the vent hoses. Loosen the vent hose clamps to allow the rear cover to pull out more.
-
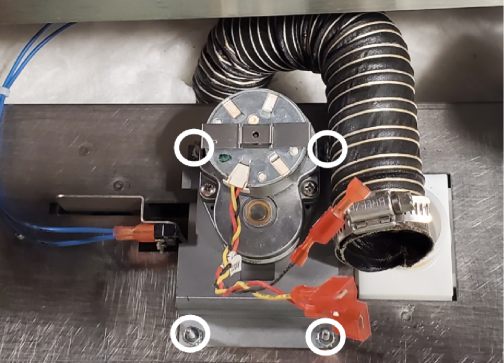
Disconnect the vent motor wires.
-
Remove the four nuts securing the vent motor plate assembly.
-
Remove vent motor.
-
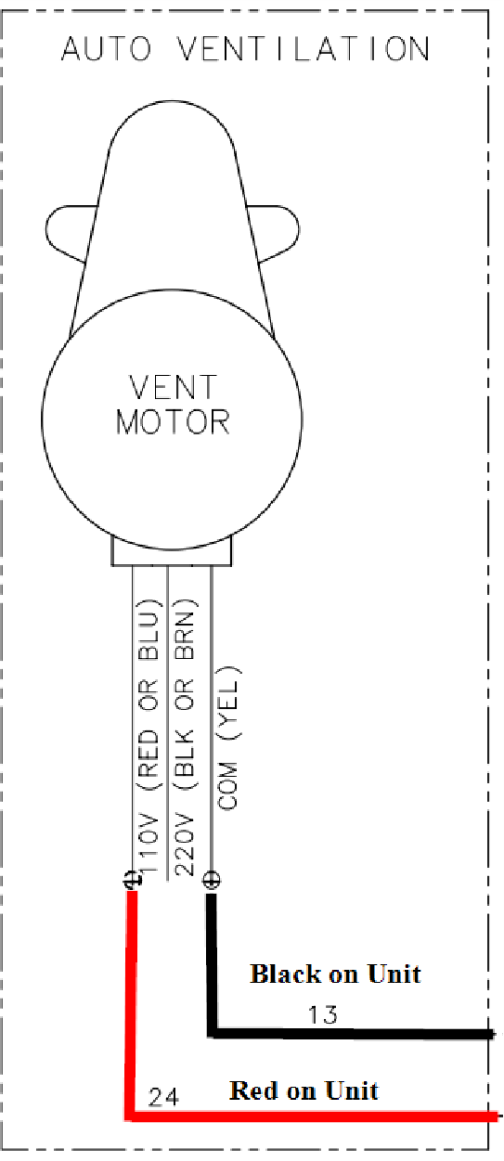
Install new vent motor and rewire appropriately to the voltage of the unit displayed in shown below.
-
Working in reverse complete steps 5 through 1 and return cabinet to operation.
Related Content
Replacing the Air Temperature Probe
Replacing the Food Probe Receptacle
Replacing the Air Heater High Limit
Replacing the Vent Motor Microswitch
Replacing the Fuse and Fuse Holder
HHC 99X Troubleshooting the E-5 Air Temp Sensor Failed Error Code
HHC 99X Troubleshooting the E-80 Vent Stuck or Bad Switch Error Code
HHC 903/993 Stacking Kit Instructions
Replacing the Air Temperature Probe
Replacing the Air Heater High Limit
Replacing the Vent Motor Microswitch
AHC 99X Troubleshooting E-5 Air Temperature Too Hot
AHC 99X Troubleshooting E-6 Air Temperature Sensor Failed Error Code
AHC 99X Troubleshooting E-80 Vent Stuck or Bad Switc
Reference