Applies to:

Replacing the Trough
 Required tools
-
Drill with crosstip bit or screwdriver
-
1/4 in (6 mm) socket or nut driver
-
Flat blade screwdriver
-
3/8 in (10 mm) socket or nut driver
-
7/16 in (11 mm) socket or nut driver
-
Basic hand tools
Kit contents
-
Trough
-
Trough Spout Gasket
-
Hardware Items
-
Blue Threadlocker
Estimated Time
60 minutes

|
Only perform this procedure when the fryer is cool or severe burns may result. |
Preparing Fryer
-
Turn power switch off.
-
Ensure fryer is cool to the touch before moving.
-
Pull out the fryer and unplug from power source.
Replacing Trough
-
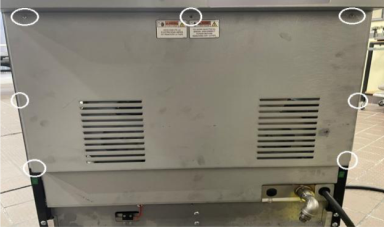
Using drill with crosstip head bit or screwdriver, remove 7 screws securing rear cover. Remove rear cover and set aside.
-
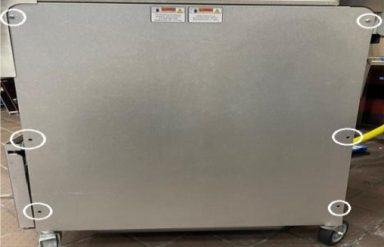
Using drill with crosstip head bit or screwdriver, remove 6 screws securing side panels. Remove side panels and set aside.
-
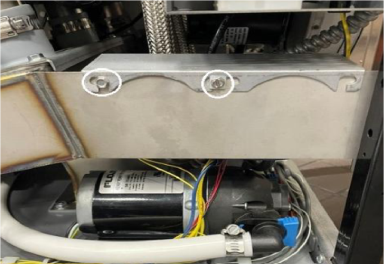
Using 1/4 in (6 mm) socket or nut driver, loosen 2 bolts on pressure box bracket on each side of the fryer. Slide pressure box bracket up and off of trough bracket.
-
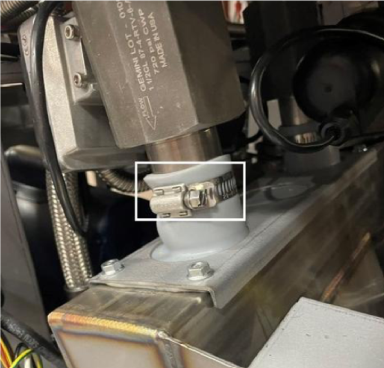
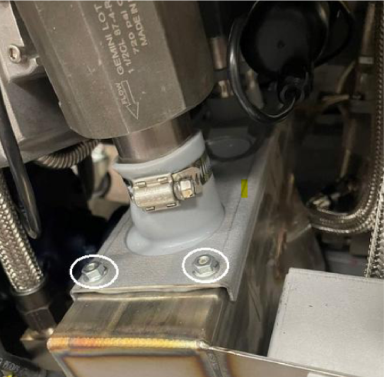
Using flat blade screwdriver, loosen all hose clamps on trough gaskets.
-
Using 3/8 in (10 mm) socket or nut driver, remove 4 nuts on each gasket cover. Remove covers and gaskets and set aside.
NOTE: Number of gaskets and covers will vary depending on model.
-
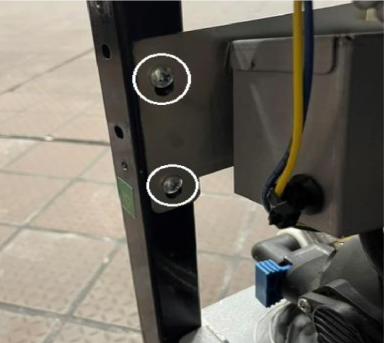
Using drill with crosstip head bit or screwdriver, remove 2 screws per bracket on each side of fryer.
-
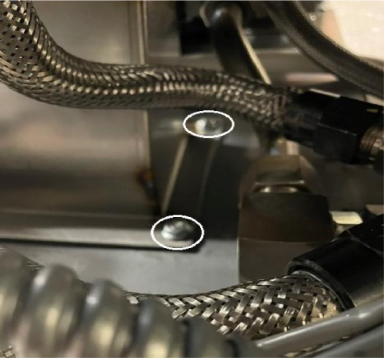
Using 7/16 in (11 mm) socket or nut driver, remove 4 nuts securing trough spout.
-
Carefully slide trough out from fryer.
-
Remove old spout gasket and discard.
-
Locate new spout gasket from kit and install onto studs.
-
Locate new trough from kit and install on gasket and studs. Replace 4 - 7/16 in (11 mm) nuts and tighten.
-
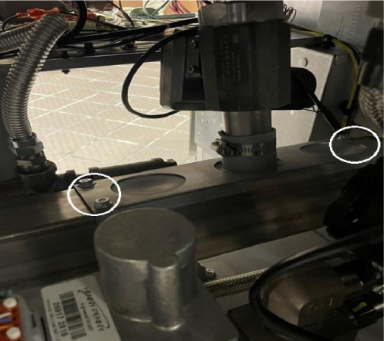
Reinstall 2 screws per bracket on each side of the fryer.
-
Reinstall trough gaskets and covers. Using 3/8 in (10 mm) socket or nut driver, reinstall 4 nuts on each gasket cover.
-
Slide gasket and hose clamp over drain valve tube and tighten clamp.
-
Place pressure box bracket back into position on trough braces. Using 1/4 in (6 mm) socket or nut driver, tighten 2 bolts on each side.
-
Replace side panels.
-
Replace rear cover.
-
In reverse cover, complete steps 3 through 1 in Preparing Fryer, and return fryer to operation.