Applies to:

Replacing Gas Valve - CE
 Required tools
-
7/16 in (11 mm) Wrench
-
Adjustable Wrench
-
3/8 in (10 mm) Socket or Nut Driver
-
White Pipe Thread Sealant
-
Drill with Crosstip bit or Screwdriver
-
Basic Hand Tools
Kit contents
-
Gas Valve
-
Safety Solenoid
-
Safety Solenoid Shield
-
1/2 in x 90 Elbow
-
1/2 in NPT Elbow
-
1/4 in Tube Elbow
-
1/2 in NPT Pipe Nipple
-
Pilot Tube
-
Pilot Tube Compression Fittings
-
Screws
Estimated Time
90 minutes

|
Only perform this procedure when the fryer is cool or severe burns may result. |
Preparing Fryer
-
Turn power switch off.
-
Ensure fryer is cool to the touch before moving.
-
Pull out the fryer and unplug from power source.
Replacing CE Gas Valve
-
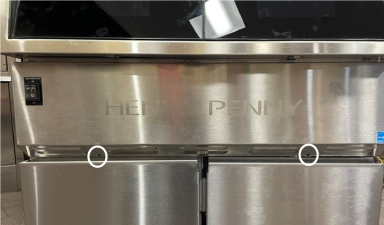
Remove 2, 3, or 4 screws, depending on fryer, securing front cover using drill with crosstip bit or screwdriver.
-
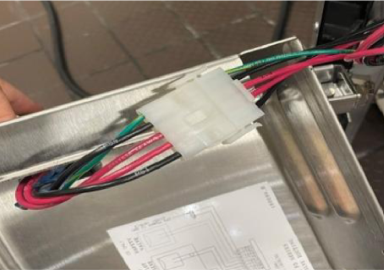
Unplug wire connector. Remove cover and set it aside.
-
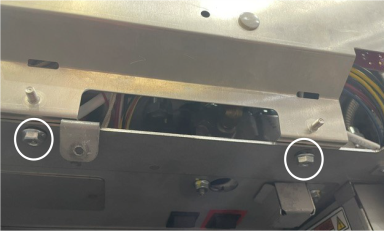
Using 3/8 in (10 mm) socket or nut driver, remove 2 nuts securing GMU bracket.
-
Lower bracket to service position, replace nuts and hand tighten to secure.
-
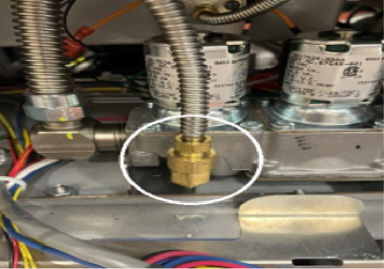
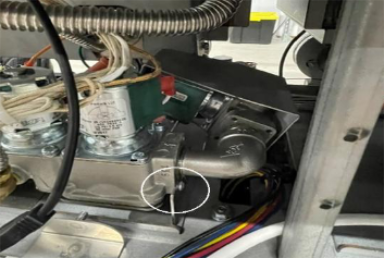
Using 7/16 in (11 mm) wrench, loosen compression fitting on brass elbow and pull pilot tube out.
-
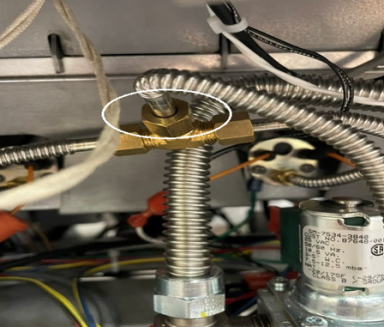
Using adjustable wrench, loosen gas flex line nut on left elbow coming out of gas valve and straight fitting on full vat/tee fitting on split vat coming out of safety solenoid.
-
Disconnect wiring on gas valve coils.
-
Disconnect wiring on safety solenoid coil.
-
Using 3/8 in (10 mm) socket or nut driver, remove 2 nuts securing gas valve brackets.
-
Remove gas valve.
-
Locate new gas valve, safety solenoid valve, safety solenoid shield, 1/2 NPT elbow, 1/2 in x 90 elbow, and brass elbow from kit.
-
Using white pipe thread sealant, assemble elbows onto gas valve.
-
Using drill with crosstip bit or screwdriver, remove 2 mounting brackets from old gas valve and install onto new gas valve.
-
Install new gas valve assembly into fryer.
-
Reinstall 2 nuts using 3/8 in (10 mm) socket or nut driver to secure gas valve mounting brackets.
-
Reconnect wiring on gas valve coils and safety solenoid.
-
Reinstall gas flex line nut on elbow, and straight fitting for full vat/tee fitting for split vat, using adjustable wrench to tighten.
-
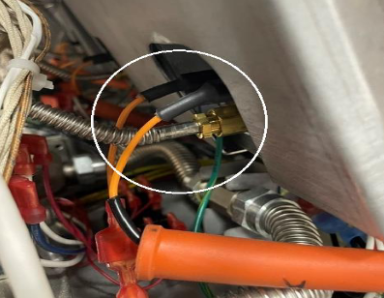
For full vats, locate new pilot tube and compression fittings from kit and install.
-
For split vats, locate new pilot tube and compression fittings from kit and install.
-
Loosen 2 nuts securing GMU bracket, move bracket back into operating position and reinstall nuts using 3/8 in (10 mm) socket or nut driver to tighten.
-
Reconnect wire connector on front cover. Reinstall front cover using drill with crosstip bit or screwdriver to tighten screws.
-
In reverse order, complete steps 3 through 1 in Preparing Fryer, and return fryer to operation.
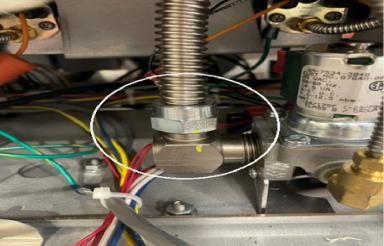
|
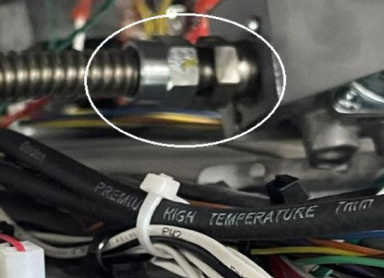
|
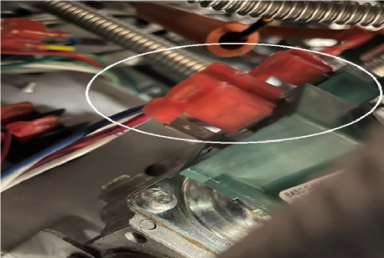
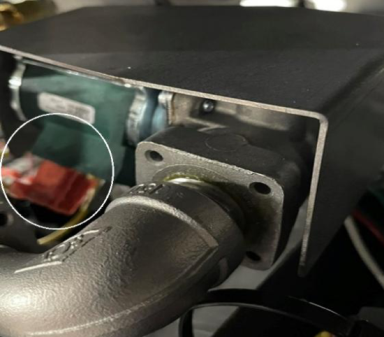
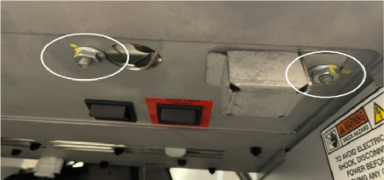
NOTE: Stem cover is secured by nut on right hand side. Support while loosening nut and remove. Set cover aside.
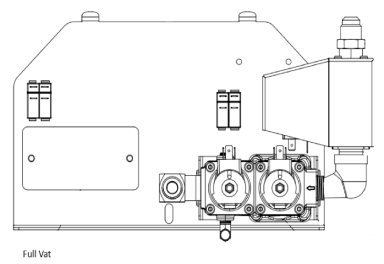
Full Vat Assembly
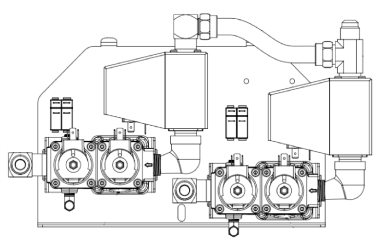
Split Vat Assembly
Left gas valve assembly uses 1/2 in NPT Straight Fitting on Safety Solenoid.
Right gas valve assembly uses 12 in NPT Tee Fitting on Safety Solenoid.
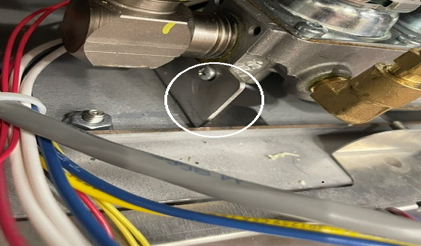
|
|
|
|
|
|

|
To avoid personal injury or explosion, check piping and fittings for gas leaks. Leaking gas may cause an explosion. |
Check for leaks per Gas Supply. If a leak is detected, shut off gas control valves and repair leak.
Related Content
Troubleshooting an E-4 Error VIU/OMS/GMU Board Overheating
Troubleshooting an E-5 Oil Too Hot Error Code
Troubleshooting an E-6 (A-B) Temperature Probe Failed Error Code
Troubleshooting an E-10 High Limit Error Code
Troubleshooting the E-20 (A-B) Pressure Switch Stuck Closed/Open Error Code
Troubleshooting the E-20 C Pilot Valve Signal Not Detected Error Code
Troubleshooting the E-20 D Gas Ignition Failure No MV Signal Error Code
Troubleshooting the E-20 (J-K) PV2/MV2 Jumper Missing (Split Vat Only) Error Code
Troubleshooting the E-20 M GMU Relay Failure (MV) Error Code
Troubleshooting the E-20 S Safety Relay Failure Error Code
Troubleshooting an E-21 Slow Heat Recovery Error Code
Troubleshooting an E-22 No Heat Error Code
Troubleshooting the E-93T Transformer 24 VAC Failure/Not Connected Error Code
Replacing Temperature and Level Probe
Replacing Blower Control Board
Troubleshooting an E-4 Error VIU/OMS/GMU Board Overheating
Troubleshooting an E-5 Oil Too Hot Error Code
Troubleshooting an E-6 (A-B) Temperature Probe Failed Error Code
Troubleshooting an E-10 High Limit Error Code
Troubleshooting the E-20 (A-B) Pressure Switch Stuck Closed/Open Error Code
Troubleshooting the E-20 C Pilot Valve Signal Not Detected Error Code
Troubleshooting the E-20 D Gas Ignition Failure No MV Signal Error Code
Troubleshooting the E-20 (J-K) PV2/MV2 Jumper Missing (Split Vat Only) Error Code
Troubleshooting the E-20 M GMU Relay Failure (MV) Error Code
Troubleshooting the E-20 S Safety Relay Failure Error Code
Troubleshooting an E-22 No Heat Error Code
Troubleshooting the E-21 Slow Heat Recovery Error Code
Troubleshooting the E-93T Transformer 24 VAC Failure/Not Connected Error Code
Reference