Replacing the Blower
crosshead screwdriver
7/16" nut driver
blower

|
To avoid electrical shock or property damage, disconnect power before installing or servicing equipment. A qualified technician must perform the service procedures. |
-
Remove electrical power to unit.
-
Using crosshead screwdriver, remove the side panel closest to the controls.
-
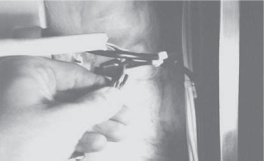
Remove electrical wires from wire nuts.
-
Remove discs and rod from inside of unit. See Cleaning.
-
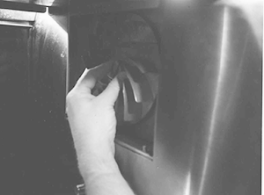
Unscrew knob and lift drive-side vent panel up and out of unit.
-
Loosen thumb screw and pull out on fan blade and remove from shaft.
-
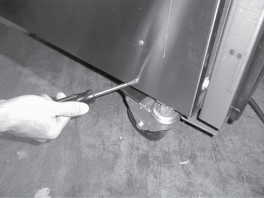
Using a 7/16" nut driver, remove the nuts securing the blower to the unit, and remove blower from unit.
-
Replace with new blower in reverse order.
When placing fan blade back onto shaft, rotate fan blade on the blower shaft, while holding the blower wheel inside the control area. The fan blade should snap onto a pin at the base of the shaft.
Related Content
Replacing the Blower Motor Capacitor
Replacing the Halogen Lamp Socket
Radiant Heat Deflectors Instructions
Radiant Heat Deflectors Instructions
SCR 6/8 Lamp Guard Installation Instructions
Troubleshooting an E-6 Error Code
Troubleshooting the Temperature Inside Not Matching the Control
Converting SCR 6 or 8 between Phases
Reference