Replacing the High Limit
crosshead screwdriver
multimeter
7/16” socket
3/8” socket
5/16” socket
high limit
The high limit is a safety device which senses an overheating situation inside the rotisserie (around 500ºF), which shuts the heat off in the unit. Once the temperature inside the unit goes down, then the high limit automatically resets and the unit can then be heated. All SCRs have two high limits. The SCR-6 and SCR-8 both have a 450ºF high limit and a 500ºF high limit. The SCR-3 has a 285ºF high limit and a 450ºF high limit.
European, CE units have 450ºF, manual reset high limits. These have a reset button on them and must be manually pressed. Follow the steps in the procedures in this section to access this high limit.

|
To avoid electrical shock or property damage, disconnect power before installing or servicing equipment. A qualified technician must perform the service procedures. |
-
Remove electrical power to unit.
-
Using crosshead screwdriver, remove the side panel closest to the controls.
-
Unplug the wires from the 500ºF high limit (285ºF on SCR-3s) and check for continuity between the terminals. When the cabinet temperature is below 300ºF, the high limit should show continuity. If it does show continuity, continue on with this section. If it doesn’t, replace this high limit with a new one and unit should then be ready for use.
-
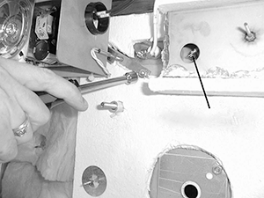
If the 500ºF high limit shows continuity, the 450ºF high limit could be bad. To access this high limit, remove the insulation washer from the stud and remove the insulation.
For CE, European units, the reset button can be accessed at this time. Use a pen, pencil, or screwdriver to press the button through the hole in the box. If unit now heats, replace the insulation and side panel and unit is ready for use. If unit does not heat, proceed with the following steps.
Units with a small diameter hole, in the high limit box, must follow the preceding steps to access the wires and mounting nuts of the high limit. Units with a large diameter hole can access the wires and mounting nuts from the hole in the front of the box.
-
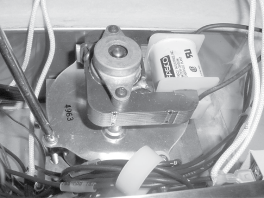
Remove the fan assembly from the interior of the unit.
-
Using a 7/16” socket, remove the nuts securing the blower and pull the blower from the studs.
-
Using a 3/8” socket, remove the nut securing the probe bracket, and pull the bracket from the stud.
-
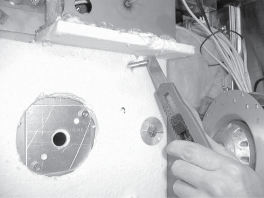
Cut insulation to access the top, right stud of the blower.
-
Pull the box from the unit to access the high limit.
-
Pull the wires from the high limit, and take a continuity check across the terminals. If it shows continuity, the high limit is good. If the high limit shows no continuity and the temperature is below 300ºF, proceed with the following steps.
-
Using a 5/16” socket, remove the two nuts securing the high limit and remove the high limit.
-
Replace with a new high limit and replace the wires.
-
Replace the box, blower and blower nuts, insulation, insulation washer, and probe bracket and nut.
-
Replace side panels and restore power to unit.
Related Content
Replacing the Blower Motor Capacitor
Replacing the Halogen Lamp Socket
Radiant Heat Deflectors Instructions
Radiant Heat Deflectors Instructions
SCR 6/8 Lamp Guard Installation Instructions
Troubleshooting an E-6 Error Code
Troubleshooting the Temperature Inside Not Matching the Control
Converting SCR 6 or 8 between Phases
Reference