Replacing the Contactor
crosshead screwdriver
multimeter
contactor

|
To avoid electrical shock or property damage, disconnect power before installing or servicing equipment. A qualified technician must perform the service procedures. |
Checkout
-
Remove electrical power to unit.
-
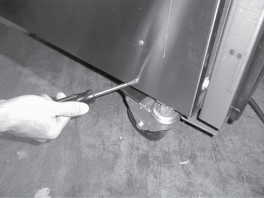
Using crosshead screwdriver, remove the side panel closest to the controls.

-
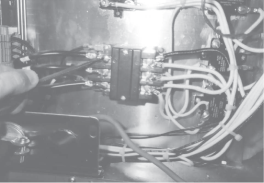
Label and remove the wires from contactor.
-
Perform a check on the contactor as follows:
Test Points Results from 23 to 29 open circuit from 24 to 28 open circuit from 25 to 27 open circuit from 22 to 26 ohm reading 415
SHOCK HAZARD
To avoid electrical shock, perform relay checks or transformer checks as described as instructions.
The following checks are performed with the wall circuit breaker closed and the main power switch in the ON position. Extreme caution should be taken. Make connections before applying power, take reading, and remove power before removing meter leads, or electrical shock could result.
-
With power reapplied, let unit start heating up.
-
Check voltage as follows:
Test Points Results from terminal 29 to 28 The voltage should read the same at each terminal. from terminal 27 to 28 from terminal 27 to 29
Replacing
If contactor proves defective:
-
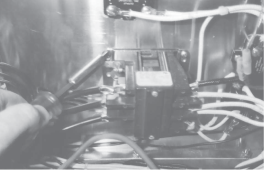
Remove the four screws securing the contactor to the bracket and remove contactor.
-
Install new contactor, replace wires, and replace side panel.
-
Restore power to unit.
Related Content
Replacing the Blower Motor Capacitor
Replacing the Halogen Lamp Socket
Radiant Heat Deflectors Instructions
Radiant Heat Deflectors Instructions
SCR 6/8 Lamp Guard Installation Instructions
Troubleshooting an E-6 Error Code
Troubleshooting the Temperature Inside Not Matching the Control
Converting SCR 6 or 8 between Phases
Reference