Required tools
-
crosstip screwdriver
-
3/8 (10mm) Nut Driver
-
1/4 (7mm) Nut Driver
Required parts
-
Power Supply x1
-
Power Supply Bracket x1
-
Hex Kep Nuts, #4-40 x4
-
Power Switch Harness (Black & White) x1
-
Power Supply Harness (Red & Black) x1
Kit number
Estimated Time
30 minutes
Preparing the Cabinet

|
Only perform this procedure when the unit is cool or severe burns may result. |
-
Turn the power switch off.
-
Unplug cabinet from power source.
-
Ensure the cabinet is cool to the touch.
-
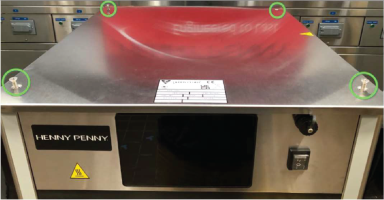
Using a crosstip driver, remove the four screws on the top of the cabinet, remove the top cap and set aside.
Replacing the Power supply
-
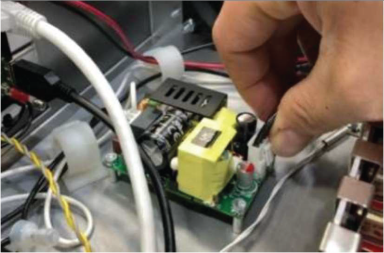
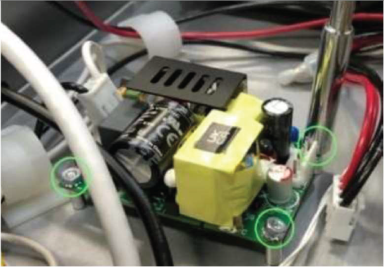
Locate the power supply in the top front of the unit and unplug the connections from the board and to the other ends of the harnesses (displays, fuses, power switch, I/O Control) and remove from cabinet.
-
Using a 1/4 (7mm) nut driver, remove the four nuts securing the power supply board and remove.
NOTE: No need to remove bracket from unit if one is already installed.
-
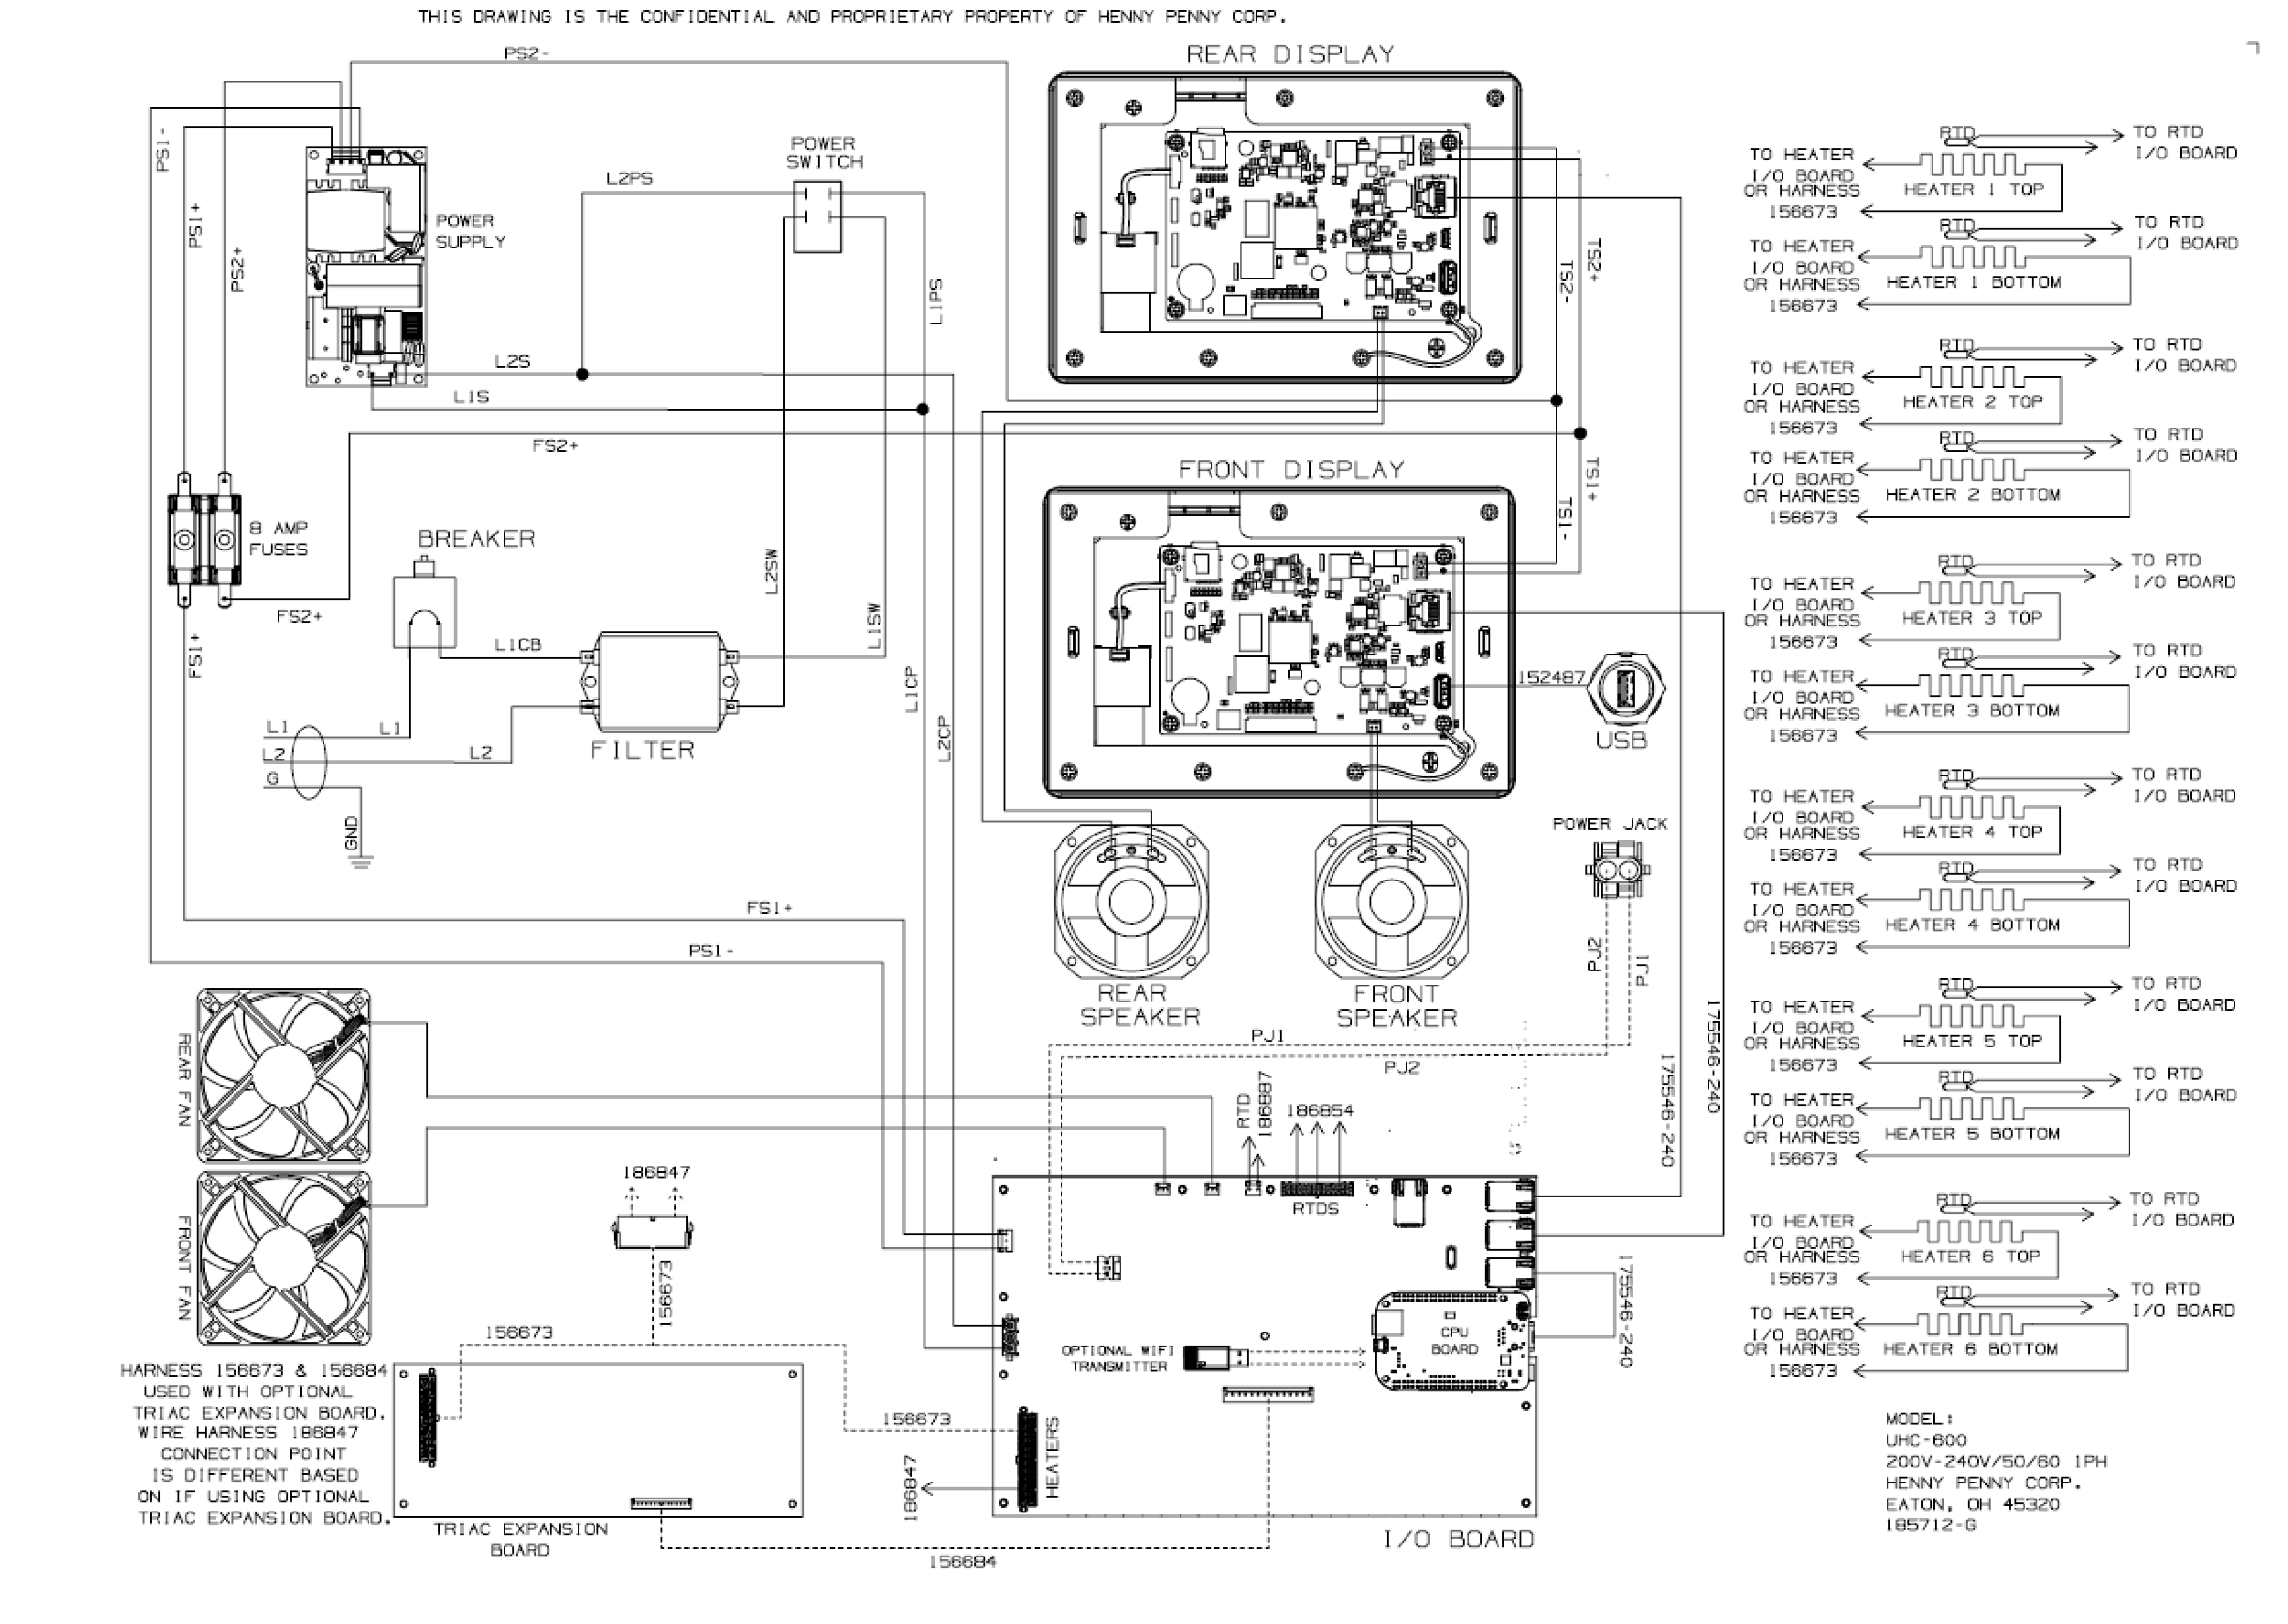
Working in reverse, complete steps 6 through 1 and return cabinet to operation. Using the new power supply harnesses supplied, rewire using diagram.
Related Content
Troubleshooting an Unresponsive Control
Troubleshooting the E-200 SD Card Missing or Unable to Read
Troubleshooting the E-205 Upload Failure from USB
Troubleshooting the E-220 Communication Loss with both Control Panels
Troubleshooting the E-220A I/O board loss of network connectivity
Troubleshooting a Low Battery or Battery Failure
Replacing the I/O Control Board
Troubleshooting the E-4A Cabinet Control Enclosure Overheating
Troubleshooting the E-4B Heat Sink Probe Overheated
Troubleshooting the E-5 Error Code Shelf Temperature Too Hot
Troubleshooting the E-6A Error Code Temp Probe Open
Troubleshooting the E-210 Cooling Fan Failure
Troubleshooting the E-216 Shelf temp too low
Installing the Power Cord Anti-Rotation Bracket
Reference