Replacing the Cam Guide

|
To avoid electrical shock or property damage, move the power switch to OFF and disconnect power. |
|
|
Lid may be hot. Allow lid to cool before performing this procedure, or burns may result. The carrier may be hot. Allow carrier to cool to prevent personal injury. |
-
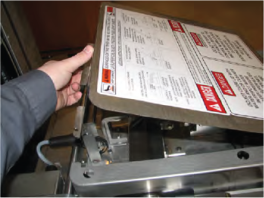
Close and latch the lid with the front latch only.
-
Using a crosshead screwdriver, remove two screws in rear of lid top cover.
-
Using a flat blade screwdriver, pry rear of lid top cover up.
-
Pull lid top cover up until it clears sides.
-
Using a flat blade screwdriver, pry the front of the lid cover forward until it clears the two front pins.
-
Remove lid top cover and set aside.
-
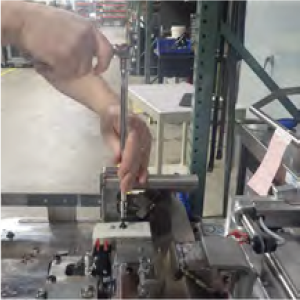
Using the 5/32 hex key, remove the two screws and split ring lockwashers on the cam guide assembly on each side of the lid (4 screws total).
Using a hex key with well-defined edges can assist in removing the screws.

-
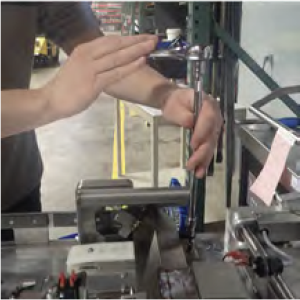
Remove the old cam slide and replace with the new cam slide.
-
Ensure holes in all pressure pads, shims, and spacers align with holes in lid.
-
Apply blue threadlocker to both screws and lid holes, and start threading through cam guide assembly.
Screw shown loosely in hole to assist with alignment.
Related Content
Replacing the Nylatron Vertical Strip
Converting Velocity Pressure Fryer to Open Fryer
Armored Cable Grounding Installation Instructions for Australia
Lid Latch Adjustment or Replacement
Velocity Steam Box Swap-out Instructions
Velocity Nylatron Vertical Filler Strips Installation Instructions
Lid Handle Replacement Instructions
Velocity Deadweight Orifice Clean-out Tool Installation and Maintenance
Velocity Lid Cable Replacement
Add pressure gauge to PXE unit Instructions (Japan / Hong Kong)
Instructions to replace PXE Interlock Latch Pivot Pin
Add pressure gauge to PXE unit Instructions
Troubleshooting a PXE 100 E-84 Error Code
Troubleshooting a PXE 100 E-13 Error Code
Reference
Product Racking Recommendations
PXE 100 Inspection and Planned Maintenance