PXE Pump Motor Installation
Kit number
140499
140500
Estimated Time
1 Hour
Summary
Follow these instructions to replace a flange mount style pump and motor with the new face mount style.
Important
If you are replacing the pump on an Open fryer (OXE) then you can disregard any instructions related to the condensate pan, condensate tube weldment, flex hose & hose clamp.
-
Turn the power switch off.
-
Ensure fryer is cool to the touch before moving.
-
Pull out the fryer, and then unplug from the power source.
-
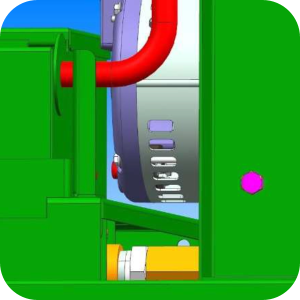
Remove right side panel for access to pump motor.
-
Remove condensate pan and condensate tube weldment and discard. This bracket weldment has 2 nuts and a hose clamp that will need to be removed.
-
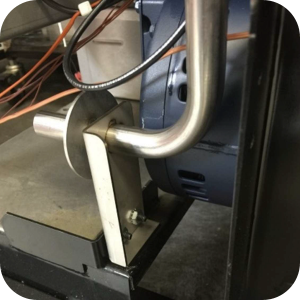
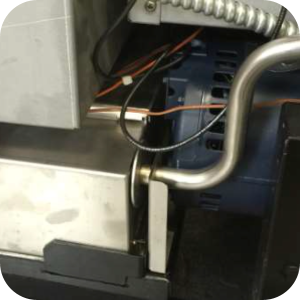
Disconnect fittings and electrical connections for pump motor to be removed from fryer.
-
Remove the motor and pump as an assembly.
-
Install new face mount pump to the new motor using the bolts and both washer types included in the kit, ensuring the square head priming port on the pump is facing the inlet side.
-
Install the new pump and motor assembly onto the pump bracket same as old pump.
-
Re-attach fittings. When installing the new pump motor assembly onto the unit, ensure the pump does not rest on the bottom of the condensate shelf. Ensure there is at least 1/4 in. of space between the bottom of the motor and the top of condensate shelf using a spacer.
-
Tighten the motor assembly to the pump bracket.
-
Re-assemble all plumbing and electrical connections. Ensure the motor is set for the correct voltage.
-
Install new condensate tube weldment onto the frame, same as the previous one was installed.
-
Re-attach rubber hose with hose clamp.
-
Place new condensate pan onto shelf.
-
Re-attach right side panel.
-
Move fryer back into place and plug back into power source.
-
Unit is now ready for use.
Related Content
Replacing the Filter Pump Motor
Replacing the Filter Pump Motor Seal
Replacing the Filter Pump Motor Rollers
Replacing the Drain Valve and Actuator
Replacing the Selector Valve Motor and Encoder
Selector Valve Motor/Encoder Replacement
Front Dispose Addition (for Bulk Oil Units)
Remove Selector Valve to ATO flex tube
Flexible Line Replacement Kit (Formed Tube), (Standard, Bulk-Oil Fryer)
Flexible Line Replacement Kit (Formed Tube), (Standard, NON Bulk-Oil Fryer)
Troubleshooting a PXE 100 E-93 Error Code
Troubleshooting Slow Refill No Detect Error on PXE 100
Troubleshooting Bulk Tank Full Message on PXE 100
PXE 100 Troubleshooting the E-18 Level Probe Failure Error Code
PXE 100 Troubleshooting the Oil not Pumping
Lid Latch Adjustment or Replacement
Armored Cable Grounding Installation Instructions for Australia
Velocity Steam Box Swap-out Instructions
ZigBee Radio Communication Kit
Velocity Nylatron Vertical Filler Strips Installation Instructions
Lid Handle Replacement Instructions
Velocity Deadweight Orifice Clean-out Tool Installation and Maintenance
Velocity Lid Cable Replacement
Add pressure gauge to PXE unit Instructions (Japan / Hong Kong)
Instructions to replace PXE Interlock Latch Pivot Pin
Temp/Level Probe Fitting Replacement
Label Replacement Instructions
High Limit Protection Probe Installation (CE Version built prior to 5/2020, ALL Versions after)
High Limit Protection Probe Installation (UL Version built prior to 5/2020)
Add pressure gauge to PXE unit Instructions
Menu Card Removal Replacement Instructions
Save and Load Setpoint Instructions
Velocity High Limit Adjustment Instructions
Reference
Product Racking Recommendations
PXE 100 Inspection and Planned Maintenance