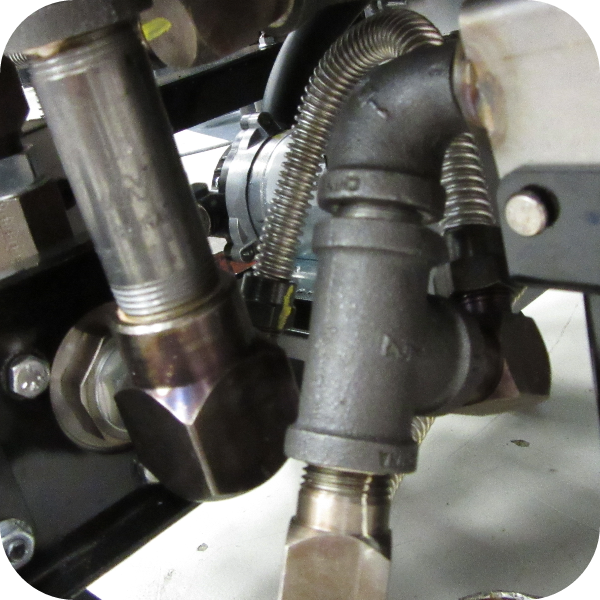
Remove Selector Valve to ATO flex tube
5/16 in. Socket and Ratchet
3/8 in. Socket and Ratchet
Adjustable wrench
Crosstip head screwdriver
Drill gun with crosstip bit
Flathead screwdriver
Pipe wrench
Thread sealant
Kit number
140596
Estimated Time
15 - 20 minutes

|
To avoid electrical shock or property damage, disconnect power before installing or servicing equipment.A qualified technician must perform the installation. |
-
Disconnect fryer electrical power from wall and move fryer away from wall. Ensure access to left side panel.
-
Use a crosstip head screwdriver or drill to remove two screws holding left side panel in place.
-
Use a flathead screwdriver to remove side panel.
-
Use an adjustable wrench or 7/8 in. wrench to remove flare nuts on both sides of short flex tube. The short flex tube connects the selector valve to auto top off box manifold, discard.
-
Use an adjustable wrench to remove FP01-205 and discard.
-
Apply food grade thread sealant to threads.
-
Use 3/8 in. hex-key to install FP01-04.
-
Loosen and remove elbow on the selector valve, discard.
-
Use a 5/16 in. hex-key to install FP01-334. Do not use thread sealant on tihs plug, the O-ring creates a seal.
-
Test fryer for leaks.
-
Re-install side panel with screws and return fryer to normal service.
Related Content
Replacing the Filter Pump Motor
Replacing the Filter Pump Motor Seal
Replacing the Filter Pump Motor Rollers
Replacing the Selector Valve Motor and Encoder
Replacing the Drain Valve and Actuator
Replacing the Nylatron Vertical Strip
Velocity Nylatron Vertical Filler Strips Installation Instructions
Selector Valve Motor/Encoder Replacement
Velocity Deadweight Orifice Clean-out Tool Installation and Maintenance
Velocity Lid Cable Replacement
Instructions to replace PXE Interlock Latch Pivot Pin
Front Dispose Addition (for Bulk Oil Units)
Flexible Line Replacement Kit (Formed Tube), (Standard, Bulk-Oil Fryer)
Flexible Line Replacement Kit (Formed Tube), (Standard, NON Bulk-Oil Fryer)
Troubleshooting Slow Refill No Detect Error on OXE 100
Troubleshooting Bulk Tank Full Message on OXE 100
OXE 100 Troubleshooting the E-18 Level Probe Failure Error Code
OXE 100 Troubleshooting the Oil Not Pumping
Lid Latch Adjustment or Replacement
Armored Cable Grounding Installation Instructions for Australia
ZigBee Radio Communication Kit
Temp/Level Probe Fitting Replacement
Label Replacement Instructions
High Limit Protection Probe Installation (CE Version built prior to 5/2020, ALL Versions after)
High Limit Protection Probe Installation (UL Version built prior to 5/2020)
Menu Card Removal Replacement Instructions
Save and Load Setpoint Instructions
Velocity High Limit Adjustment Instructions
Replacing the Filter Pump Motor
Replacing the Filter Pump Motor Seal
Replacing the Filter Pump Motor Rollers
Replacing the Drain Valve and Actuator
Replacing the Selector Valve Motor and Encoder
Troubleshooting a PXE 100 E-93 Error Code
Troubleshooting Slow Refill No Detect Error on PXE 100
Troubleshooting Bulk Tank Full Message on PXE 100
PXE 100 Troubleshooting the E-18 Level Probe Failure Error Code
PXE 100 Troubleshooting the Oil not Pumping
Velocity Steam Box Swap-out Instructions
Lid Handle Replacement Instructions
Add pressure gauge to PXE unit Instructions (Japan / Hong Kong)
Add pressure gauge to PXE unit Instructions
Reference
Product Racking Recommendations
OXE 100 KFC Annual Inspection Certification
Product Racking Recommendations