OGA-OFG 32X Ignition Module Retrofit
Crosstip screwdriver
3/8 in. Socket or nut driver
Wire cutter or strippers
Kit number
14935 - Non-CE
14936 - CE
Estimated Time
1 Hour - 1.5 hours
-
Use a crosstip screwdriver to remove the front control panel.
-
If nuts are securing the module use a 3/8 in socket to remove.
-
If screws are securing the module use a crosstip screwdriver to remove.
-
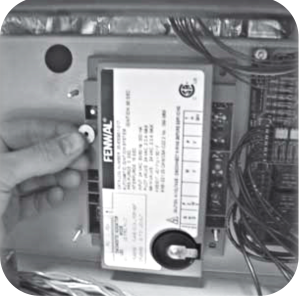
Label and remove the wires from the module.
-
Install Fenwall module. Some modules are mounted with sheet metal screws or threaded studs. Threaded studs will need a washer (supplied in kit).
-
Connect wires to new Fenwall module. Ensure labeled wires match the labled terminals. The TR-G wire will be connected to PVMV
NOTE: For Electromechanical Fryers cut and strip PM/MV and TR/G wires from module. Crimp these wires together onto a female terminal provided in the kit.
-
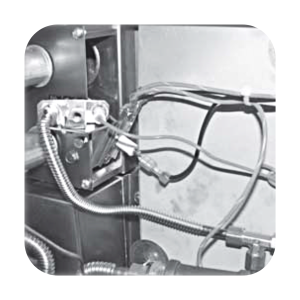
Locate the orange pilot spark wire behind the control panel and cut wire about 3 inches from spark ignitor. Discard wire.
-
Strip back the orange spark wire and crimp a male spade terminal onto the orange wire.
-
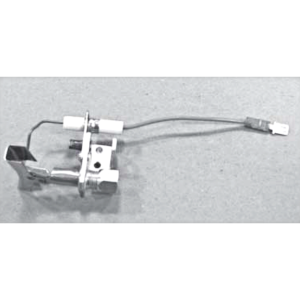
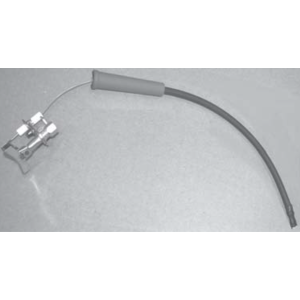
Attach larger end of suppression cable to orange spark wire.

-
Attach the smaller, non-booted end of the suppression cable to the new module at the spark terminal.
-
Replace control panel and restore power to the fryer.

|
To avoid electrical shock or property damage, move the power switch to OFF and disconnect power. |
Related Content
Replacing the Blower Motor Assembly
Replacing Heating Contactors (Electric Only)
Replacing Heating Elements (Electric Only)
Replacing the High Limit Temperature Control (Electric Units)
Replacing the High Temperature Limit Control (Gas Units)
Replacing the Flame Sensor (Gas Units)
Replacing the Pilot / Ignitor Assembly
Replacing the Gas Control Valve Assembly
Replacing the Temperature Probe
OFG/OGA 32X Replacing Gas Valve Kit
OFE 32X Installing the Spreader Bar
OFE 32X Chick-Fil-A Element Bracket
Troubleshooting the OFG 32X Fryer Stuck in Ignition Loop
Troubleshooting the OFG 32X Fryer E-4 Control Overheating Error Code
Troubleshooting the OFE and OFG 32X Fryer E-5 Oil Overheating Error Code
Troubleshooting the OFE and OFG 32X Fryer E-6 Temperature Probe Error Code
Troubleshooting the OFE and OFG 32X Fryer E-10 High Limit Error Code
Troubleshooting the OFE and OFG 32X Fryer E-20A Fan Sensor Stuck Closed Error Code
Troubleshooting the OFG 32X Fryer E-20B Pressure Switch Stuck Error Code
Troubleshooting the OFG 32X Fryer E-20D Ignition Failure Error Code
Troubleshooting the OFE 32X Fryer E-26 Heat Amps Locked Error Code
Troubleshooting the OFE and OFG 32X Fryer E-92 24V Circuit Overload Error Code
Troubleshooting the OFE 32X Fryer W-1 Low Voltage Warning
Troubleshooting the OFE 32X Fryer W-2 Slow Heating Warning
Troubleshooting the OFE 32X Fryer W-3 Was Not Ready Warning
Troubleshooting the OFE 32X Fryer W-4 Slow Cooking Warning
Troubleshooting the OFE 32X Fryer W-5 Slow Cooking Warning
Troubleshooting the OFE 32X Fryer W-6 Slow Cooking Warning
Troubleshooting the OFE 32X Fryer W-7 Low Amps Warning
Troubleshooting the OFE 32X Fryer W-9 Discard Product Warning
32X Direct Connect Oil System Operating Instructions
Direct Connect Retrofit Instructions
OFE 32X Open Drain Switch Retrofit Kit
OFG 322/323 Open drain switch retrofit kit instructions
OFE 32X Open Drain Switch Retrofit Kit
OFG 32X Open Drain Switch Retrofit
OFE 32X C1000 to C8000 Retrofit Kit
OFG 32X C1000 to C8000 Retrofit Kit
OFE 32X Reinforcing the Basket Rest
OFX 32X Replacing the Motor Shield
OFE 32X Installing the Filter Pump
OFE 32X Conversion from Full Pan to Single Pan
OGA-OFG 32X Replacing the Vacuum Switch
Reflashing the CFA ARM-Based Control
Reference