OFG/OGA 32X Replacing Gas Valve Kit
#242 Loctite (Blue)
5/16 in socket or nut-driver
3/8 in socket or nut-driver
7/16 in deep-well socket or wrench
1 in wrench
5/8 in wrench
Pipe wrench
Adjustable wrench
Crosstip screwdriver
Channel locks
Pliers
Pipe sealant
Vise
Kit number
140040
Estimated Time
1.5 Hours to 2 hours

|
To avoid personal injury or property damage, before starting this procedure, move the main power switch to the off position. Disconnect the main circuit breakers at the circuit breaker box or unplug service cord from wall receptacle. |
-
Remove control panel assembly.
-
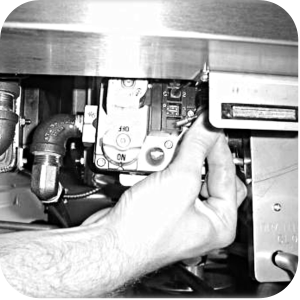
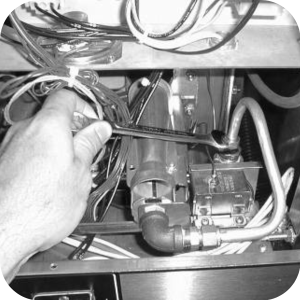
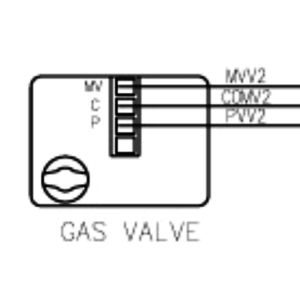
Label and remove wires from gas control valve.
-
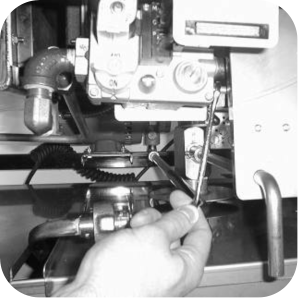
Use a 7/16 in wrench to remove the "J" bolt securing the burner assembly
-
Use a 7/16 in wrench to remove the pilot line from the gas control valve.
-
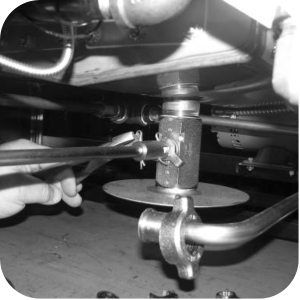
Use a 1 in wrench to loosen the nut securing the main gas inlet line to the control valve.
-
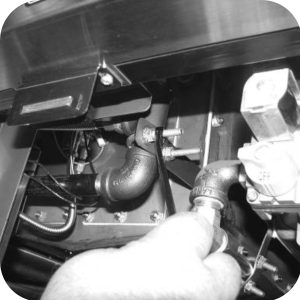
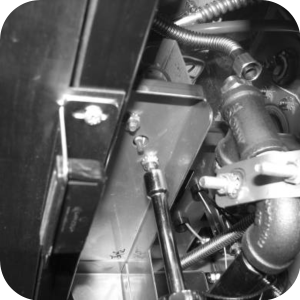
Use a 5/8 in wrench to remove the two burner gas line fittings at the black tee fitting. The black tee fitting is located behind the control panel area.
-
Use a 3/8 in socket or nut-driver to remove the nuts securing the high limit bracket.
-
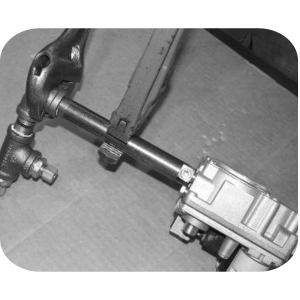
Remove cotter pin securing the drain rod handle, pull handle from unite and discard.
-
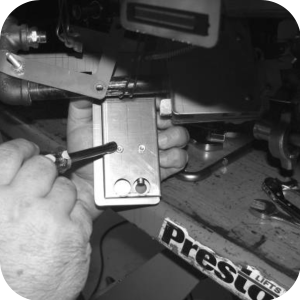
Use a crosstip screwdriver to remove the three screws securing the gas control valve bracket to the frame of the fryer.
-
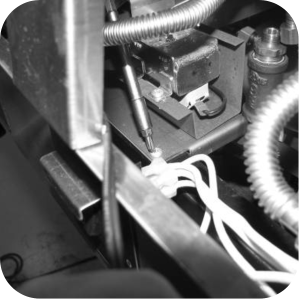
Use a 5/16 in socket or nut-driver to remove two screws and nuts, drain switch cover and drain switch from the drain switch bracket.
-
Discard cover and use new one provided in the kit.
-
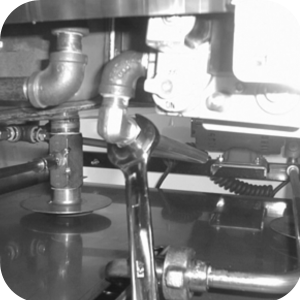
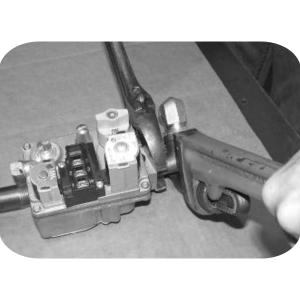
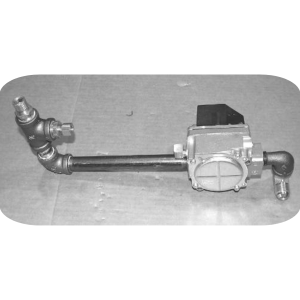
Remove the two elbows from one side of the gas valve.
-
Remove elbow and fittings attached to the nipple on the other side of the gas valve. Use fittings on the new gas valve.
NOTE: Pipe wrench, adjustable wrench and a vise may be used in removing these items.
-
Attach elbows and fittings removed to gas valve and nipple assembly. Use pipe sealant on threads.
-
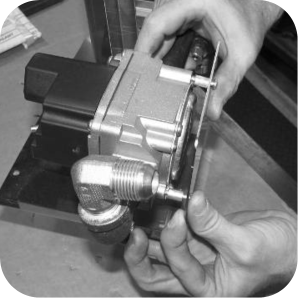
Install gas valve bracket onto gas valve assembly. Use two screws and spacers from kit. Use blue loctite on threads.
-
Use plastic bushing from kit and snap into the bracket.
-
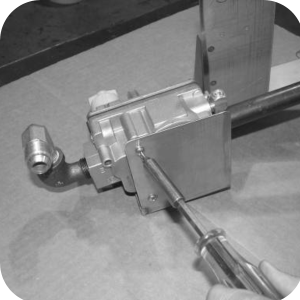
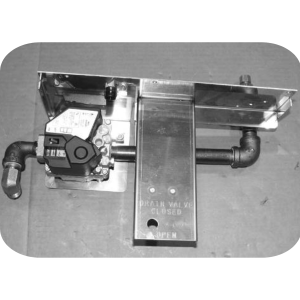
Reattach drain valve handle and gas valve and bracket assembly.
-
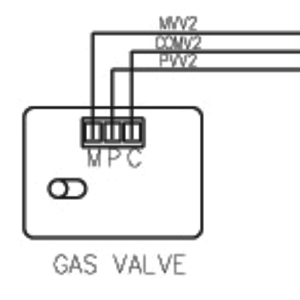
Ensure wire connections match above.
-
Attach elbows and fittings removed to gas valve and nipple assembly. Use pipe sealant on threads.
-
Install gas valve bracket onto gas valve assembly. Use 2 screws and spacers from kit. Use blue loctite on threads.
-
Snap plastic bushing into place on the bracket.
-
Install the new drain handle given in the kit. Ensure to install drain valve handle, fittings and all other components in reverse order.

|
To avoid personal injury or explosion, check piping and fittings for gas leaks. Leaking gas may cause an explosion. |
Check for leaks per Gas Supply. If a leak is detected, shut off gas control valves and repair leak.
Related Content
Replacing the Blower Motor Assembly
Replacing Heating Contactors (Electric Only)
Replacing Heating Elements (Electric Only)
Replacing the High Limit Temperature Control (Electric Units)
Replacing the High Temperature Limit Control (Gas Units)
Replacing the Flame Sensor (Gas Units)
Replacing the Pilot / Ignitor Assembly
Replacing the Gas Control Valve Assembly
Replacing the Temperature Probe
OGA-OFG 32X Ignition Module Retrofit
OFE 32X Installing the Spreader Bar
OFE 32X Chick-Fil-A Element Bracket
Troubleshooting the OFG 32X Fryer Stuck in Ignition Loop
Troubleshooting the OFG 32X Fryer E-4 Control Overheating Error Code
Troubleshooting the OFE and OFG 32X Fryer E-5 Oil Overheating Error Code
Troubleshooting the OFE and OFG 32X Fryer E-6 Temperature Probe Error Code
Troubleshooting the OFE and OFG 32X Fryer E-10 High Limit Error Code
Troubleshooting the OFE and OFG 32X Fryer E-20A Fan Sensor Stuck Closed Error Code
Troubleshooting the OFG 32X Fryer E-20B Pressure Switch Stuck Error Code
Troubleshooting the OFG 32X Fryer E-20D Ignition Failure Error Code
Troubleshooting the OFE 32X Fryer E-26 Heat Amps Locked Error Code
Troubleshooting the OFE and OFG 32X Fryer E-92 24V Circuit Overload Error Code
Troubleshooting the OFE 32X Fryer W-1 Low Voltage Warning
Troubleshooting the OFE 32X Fryer W-2 Slow Heating Warning
Troubleshooting the OFE 32X Fryer W-3 Was Not Ready Warning
Troubleshooting the OFE 32X Fryer W-4 Slow Cooking Warning
Troubleshooting the OFE 32X Fryer W-5 Slow Cooking Warning
Troubleshooting the OFE 32X Fryer W-6 Slow Cooking Warning
Troubleshooting the OFE 32X Fryer W-7 Low Amps Warning
Troubleshooting the OFE 32X Fryer W-9 Discard Product Warning
32X Direct Connect Oil System Operating Instructions
Direct Connect Retrofit Instructions
OFE 32X Open Drain Switch Retrofit Kit
OFG 322/323 Open drain switch retrofit kit instructions
OFE 32X Open Drain Switch Retrofit Kit
OFG 32X Open Drain Switch Retrofit
OFE 32X C1000 to C8000 Retrofit Kit
OFG 32X C1000 to C8000 Retrofit Kit
OFE 32X Reinforcing the Basket Rest
OFX 32X Replacing the Motor Shield
OFE 32X Installing the Filter Pump
OFE 32X Conversion from Full Pan to Single Pan
OGA-OFG 32X Replacing the Vacuum Switch
Reflashing the CFA ARM-Based Control
Reference